
Learn how to add a new field like delivery date and time picker in your WooCommerce checkout form. I'll show you the easy method in this article using a plugin. You'll see how to implement such a date/ time picker to the WC checkout.
Do your WooCommerce customers contact you to learn about the exact delivery date or time? Would be nice to automate this and avoid additional emails/ phone calls?
In this article, I will show you the way to add delivery date and time picker in your WooCommerce checkout in a few minutes with a plugin. Let's begin!
Contents
- WooCommerce Checkout Date Time Picker - Intro
- WooCommerce Checkout with a Date Picker - Plugin
- How to add WooCommerce Checkout Date picker - Steps
- Summary
- WooCommerce delivery & local pickup date time plugin
- Show Delivery Time Picker on your WooCommerce Product Page
- How to show the date picker on the WooCommerce product page
- How to Add and Display WooCommerce Custom Fields on the Checkout & Order Pages
- Customize the WooCommerce Checkout Page: Top Tips for a Seamless Experience
WooCommerce Checkout Date Time Picker - Intro
I respect your time. That's why I want to show you the final effect first. This way you'll be sure that this is what you are looking for.
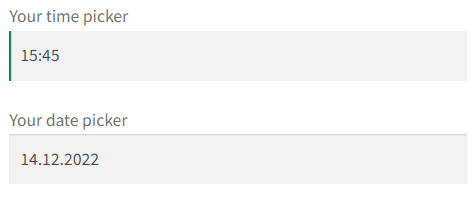
I have a default styling of the checkout in my store (learn how you can set yours). I use the Storefront theme. So, my WooCommerce Checkout Date picker looks like this:
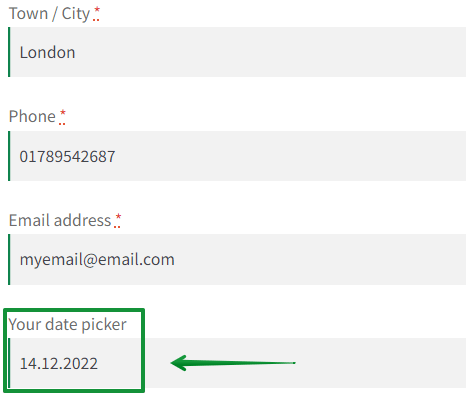
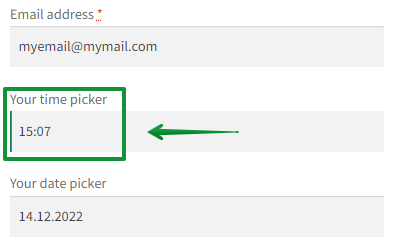
Of course, you can add more fields (like a time field) and rearrange them.
You can place a new field wherever you want in the WooCommerce checkout form!
Also, you can set this field as required if you need to. There are many more options such as conditional logic or custom validation as well. I'll tell you more about this later in this article.
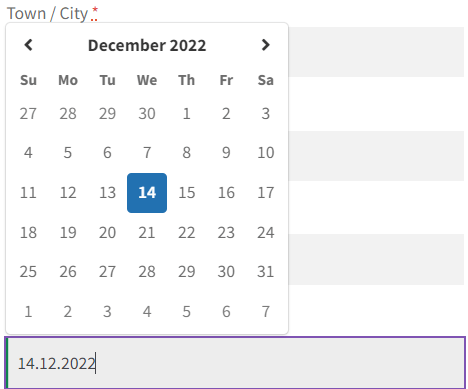
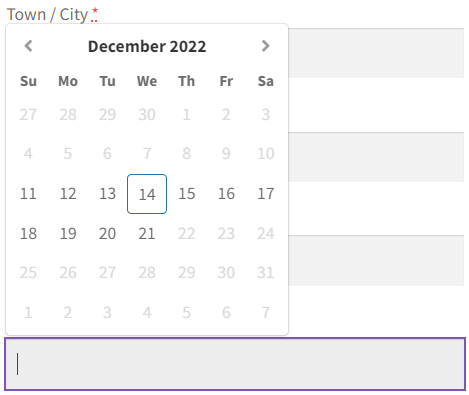
Add a new checkout field (date picker)
So, let's see the select box of the new WooCommerce checkout field - let's call it the delivery date picker:
I didn't set any time range. However, it is possible, of course!
Below you can see the select box where I set the time range to:
- 3 days before
- 7 days after
Take a look at the field with the maximum date range:
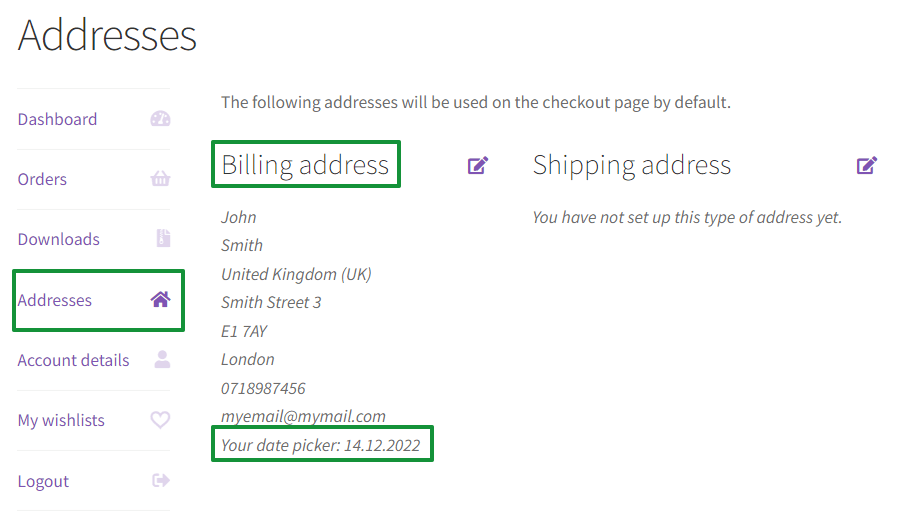
Where can I see the customer value?
The information about the value from the delivery date picker will appear in the WooCommerce order details.

This field is editable by default. It means that your customers can edit the field value on their My Account page.
Here is the date field in My Account - Addresses:
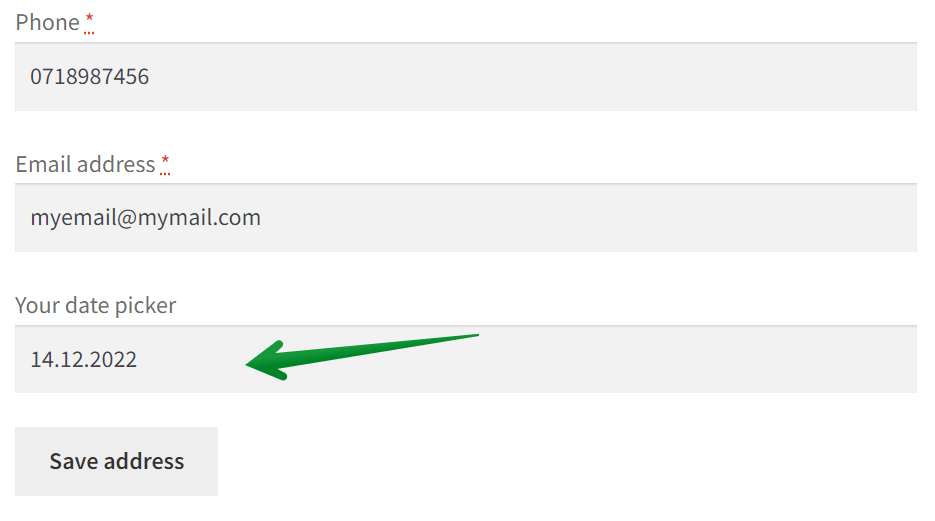
And this is the editing mode:
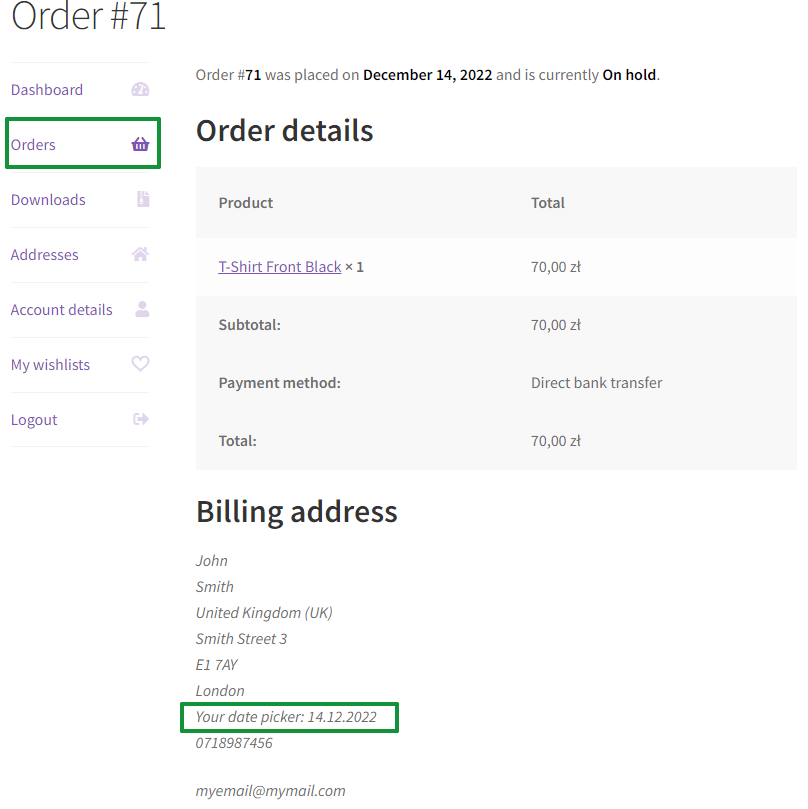
Also, a customer can look up the field's value in the Orders:
So, I hope this is what you're looking for! Consequently, I'll show you what plugin you need to configure to add such a delivery date field in your WooCommerce checkout.
WooCommerce Checkout with a Date Picker - Plugin
Flexible Checkout Fields lets you create a WooCommerce Checkout Date or Time picker, of course. However, you can do much more!
This is the plugin which that lets you customize WooCommerce checkout fields! For example, with this plugin you can:
- easily add custom fields to the WooCommerce checkout,
- edit the present ones,
- or rearrange fields in the checkout etc.
I want you to know that over 239,708 stores use this plugin worldwide daily. People rate this plugin 4.7 out of 5 stars.
You can download this plugin for free to add new following field types:
- Text
- Textarea
- Number
- Phone
- URL
- Checkbox
- Color
- Headline
- Paragraph
- Image
- HTML
However, you'll need the PRO version to add WooCommerce Checkout Date and Time picker and more field types like:
- Multi-Checkbox
- Select
- Multi-Select
- Radio
- Time
- Radio with images
- File Upload
- Radio with colors
- Date
Flexible Checkout Fields WooCommerce
Add WooCommerce date and time picker fields. It's easy and fast! With Flexible Checkout Fields, you can let your customers pick up the delivery date and time in the WooCommerce checkout!
Download for free or Go to WordPress.orgHow to add WooCommerce Checkout Date picker - Steps
- First, buy and install the PRO version of the plugin.Buy the plugin →
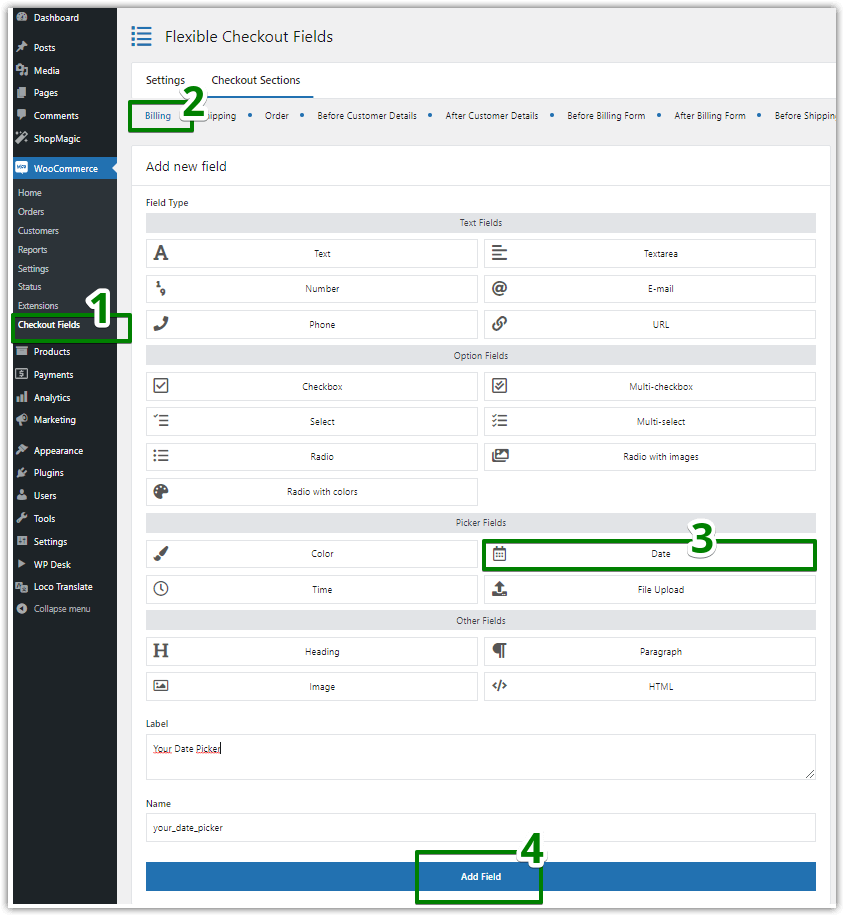
- Then, go to WooCommerce → Checkout Fields:
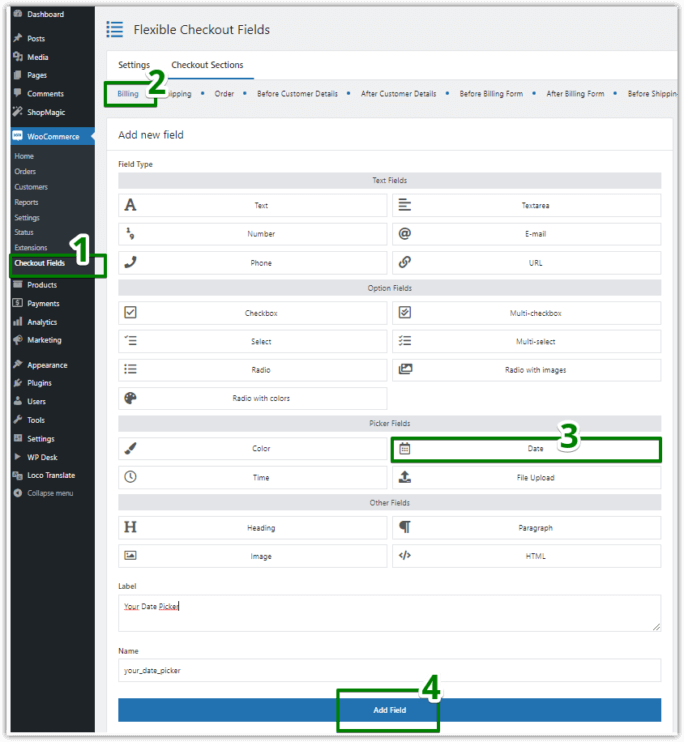
- In addition, you can edit different sections here. By default, we will edit the Billing section. However, you can add WooCommerce Checkout Datepicker wherever you want.The Flexible Checkout Fields plugin lets you add custom fields to different sections of the checkout. You easily modify the Order, Shipping, or Billing section. Also, you can add fields before or after:
- Customer Details
- Billing Form
- Shipping Form
- Registration Form
- Order Notes
- Submit Button
It may be the WooCommerce Checkout Datepicker but doesn't have to. As I said before, Flexible Checkout Fields lets you create 10 types of fields.
- Select the Field Type, provide a Label and click the Add Field button.
- After that, you can modify the settings of this new field. Look, you can set the time range here:
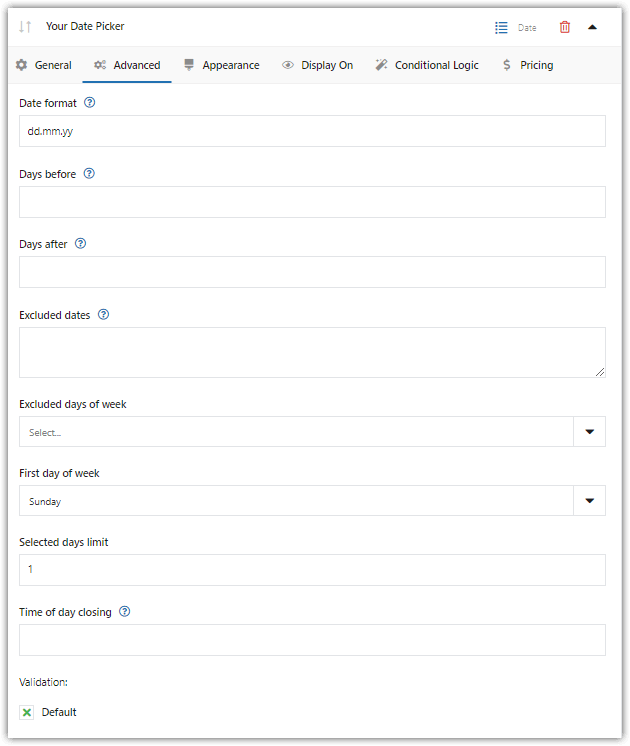 There is a Validation option as you may see. Do you need to add custom validation to this WooCommerce Checkout Datepicker? Read our WooCommerce Checkout Custom Validation Guide →
 - Next option, the Appearance. You can set your own CSS class in the field. Style the WooCommerce delivery date field!

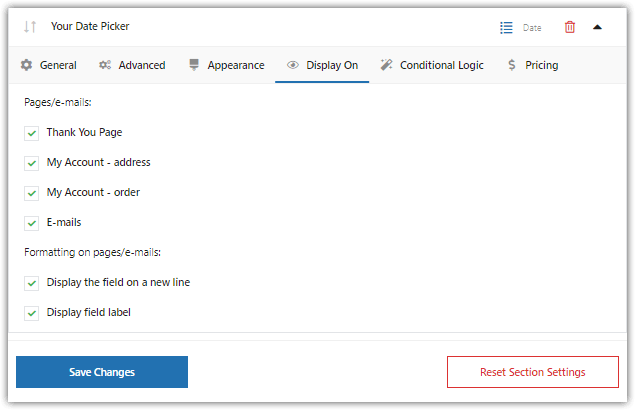
- With the Display On option, you can set where to display the WooCommerce Checkout Datepicker. For example, you can set the plugin to display this field only in the checkout. This way user won't be able to change the value of this field in My Account.
- The last option: Advanced. You can configure conditional logic here. I won't cover this topic in this article. If you need conditional logic for your fields, look up our Conditional Logic Guide →
That's it - we've just added the date picker to the WooCommerce checkout. Furthermore, remember you can add a time picker too!
Summary
To sum up, in this article, you have learned how to add a new WooCommerce Checkout field - Delivery Date (and Time picker). How do you like this method? Let us know in the comments section below! Most importantly, ask us any questions if something is not clear to you.


Hi can I add the fields to registration , checkout, billing, shipping from
I mean to say I add the fields to registration, checkout, billing, order, shipping form
Hello Fahim.
FCF plugin supports fields on the page which is set as Checkout in WooCommerce settings. It does not have to be the default checkout page – but it does have to function as the checkout page.