
WooCommerce doesn't always let you configure checkout fields the way you want. In this article, I'll show you how to add, remove, and configure WooCommerce checkout fields to be optional or required. Let's begin 🚀!
Here's a link where you can download it directly from the WordPress Repository: Download Flexible Checkout Fields Plugin →
Still, I encourage you to continue reading the article 😜
Have you ever seen an error in your WooCommerce checkout because some of the required fields were empty?
Read how to easily manage all WooCommerce checkout fields, make them optional, or just remove them from the order form with a FREE plugin 😊!
Contents
- Required fields in the WooCommerce checkout
- Manage required fields with a free plugin
- Remove Required Fields in the WooCommerce checkout
- Summary
- How to Add and Display WooCommerce Custom Fields on the Checkout & Order Pages
- Customize the WooCommerce Checkout Page: Tips & Tools for Success
- WooCommerce Checkout Field Editor: How to Add, Edit & Remove Billing Fields
- Customize the WooCommerce Checkout Page: Top Tips for a Seamless Experience
- How to Remove Billing Fields in WooCommerce Checkout - Easy Guide
Flexible Checkout Fields WooCommerce
Customize WooCommerce required fields. Remove required fields, and add or hide them. It's all up to you!
💾 Active Installations: 80,000+ | WordPress Rating:
Required fields in the WooCommerce checkout
By default, WooCommerce sets a few checkout fields as required.
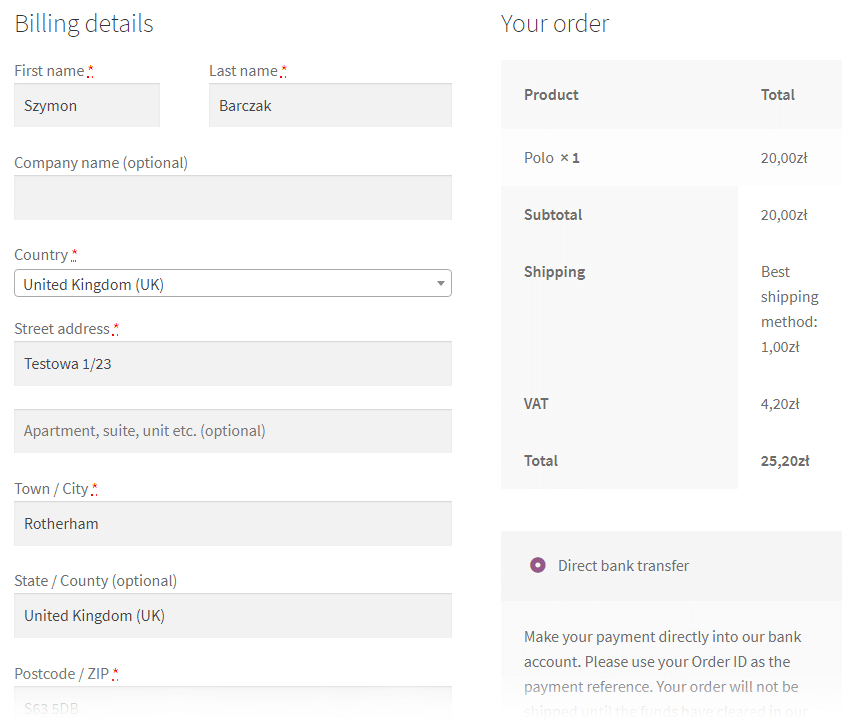
👉 You can see the required fields (they have got a red asterisk at the end of their labels):
- First Name
- Last Name
- Country
- Street address
- and so on.
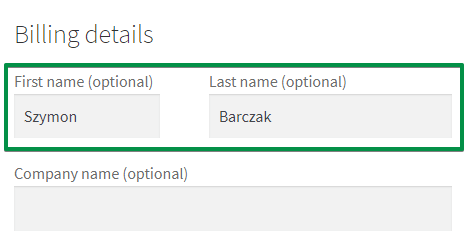
I will show you now how to set them as not required.
👉 For example, you can set the First and Last name fields this way:
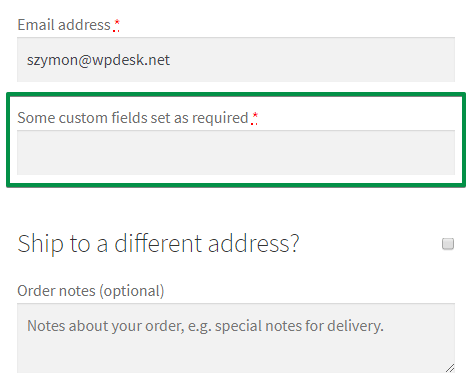
👉 Also, I'll teach you how to add your own custom fields. You can set them as required, too.
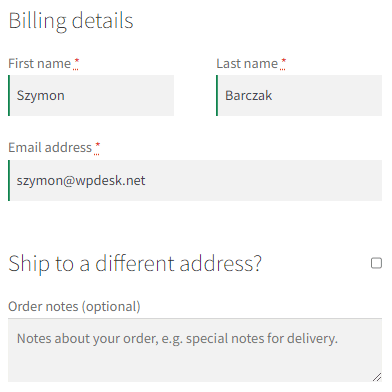
👉 What's more, it's also possible to remove (hide) some of these default fields from the WooCommerce checkout.
Before we begin, you need to install a FREE WooCommerce checkout customizer plugin. I'll show you how to install and configure the plugin that I think is very versatile.
Manage required fields with a free plugin
We have developed the Flexible Checkout Fields plugin because WooCommerce didn't give us an easy way to configure the checkout fields. And we needed this feature ⭐.
Flexible Checkout Fields WooCommerce
Customize WooCommerce required fields. Remove required fields, and add or hide them. It's all up to you!
💾 Active Installations: 80,000+ | WordPress Rating:
Have a look at the plugin's features in the free version:
As you can see, this plugin can do much more than just setting checkout fields as required 🙂
Download this plugin for free and start customizing your checkout fields!
In general, Flexible Checkout Fields lets you:
- easily add custom fields to the checkout,
- edit the present ones,
- rearrange fields in the checkout,
- show new fields and hide the default ones,
- remove WooCommerce fields or make them optional,
- and much more!
In this guide, I'll focus on how to configure and remove required fields in the WooCommerce checkout 🪟.
However, we have created more guides about the plugin features. I'll link them at the end of this article.
Remove Required Fields in the WooCommerce checkout
First, watch this tutorial video where we also explain how to make the checkout required field optional:
To remove a required field or make it optional follow the steps below.
-
Download & install the free plugin
-
Configure the WooCommerce checkout fields
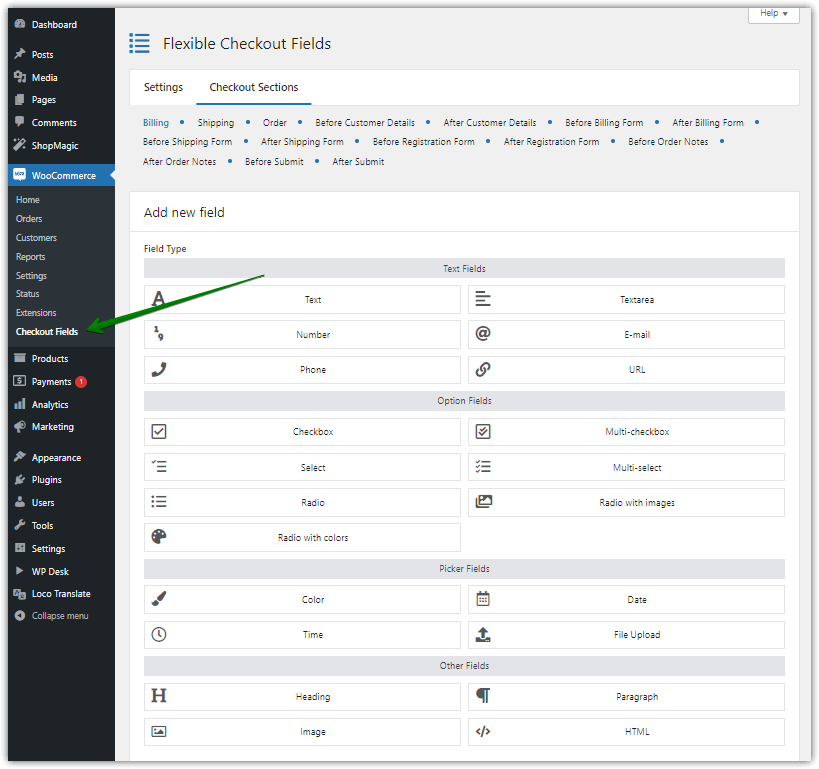
Go to WooCommerce → Checkout Fields. Here you can Add New Field or Edit Section.
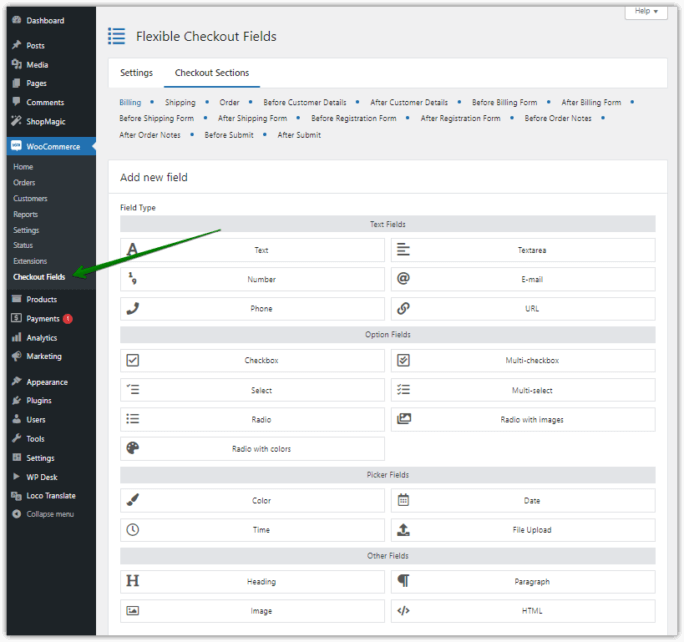
Choose Checkout Fields to customize WooCommerce required fields at checkout There are a lot of custom fields you can add with this plugin:
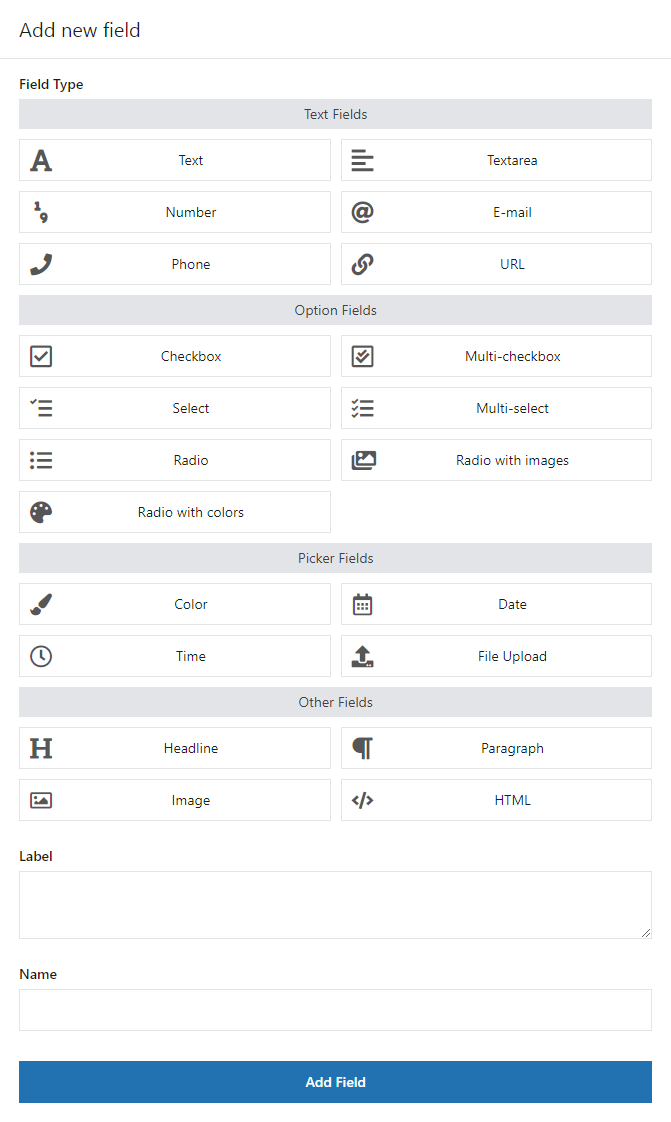
Flexible Checkout Fields: all fields available You can customize them to your needs. What's more, you can also style the checkout fields.How to remove WooCommerce checkout fields
The plugin allows adding add new fields

However, adding new fields is not our main topic. Let's go set WooCommerce checkout required fields now.
-
Remove the required field
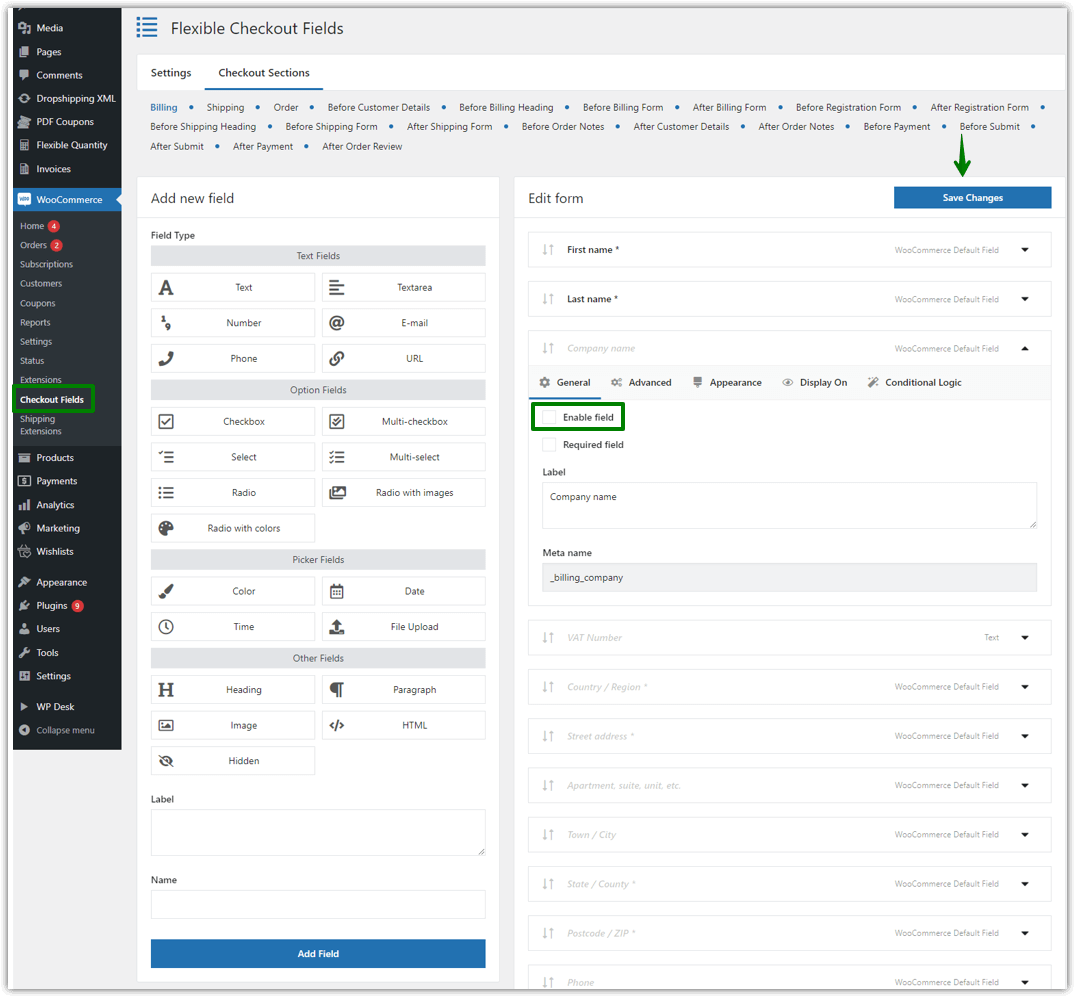
Go to any field in the Edit Section.
Here you can remove a field from the WooCommerce checkout form.
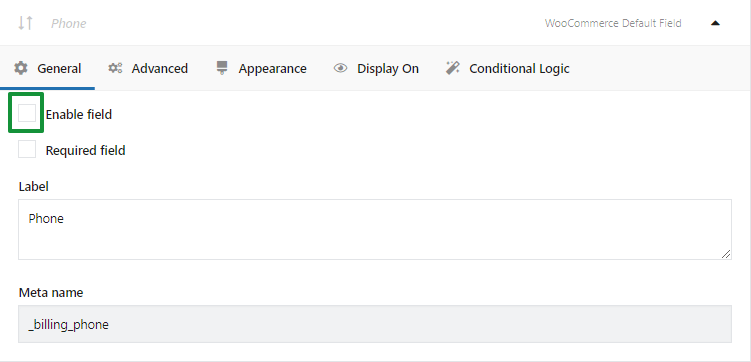
Enable or disable a checkout field by by checking or unchecking this checkbox -
Change the field to be optional
In the field setting, you can also find a Required Field option. Simply mark or unmark this checkbox ✅.
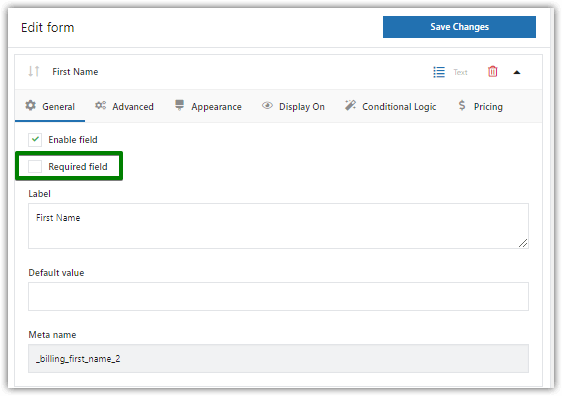
Edit WooCommerce required fields checkout This way you can set default WooCommerce fields as optional.
Of course, you can create new fields and set them as required or optional 💪!
Summary
We've reached the end of this article. That was quick! You have learned how to remove WooCommerce checkout fields and make them optional with our FREE plugin.
If you have any questions, let me know in the comments section below!
Also, you may read about advanced product fields for WooCommerce.


Leave a Reply