WooCommerce checkout features - which are mostly related to payment settings - play a vital role in running an online store. It's often thanks to them that a customer decides to make a purchase. Therefore, provide your customers with convenient payment methods, so they are more likely to buy from you. Read our step-by-step guide through the WooCommerce settings, the [ woocommerce_checkout] shortcode, guest checkout & checkout customization! Also, download the FREE plugin to customize your WooCommerce checkout page in minutes 🚀!
Table of contents
- WooCommerce Checkout Settings
- How to manage WooCommerce checkout fields
- Get a FREE plugin to customize your WooCommerce checkout
Are you sure you've set your WooCommerce checkout right and configured all the necessary settings?😊
Today, I will show you how to use the shortcode, and customize the WooCommerce checkout page design with a free plugin to get more sales! Let's begin!
Flexible Checkout Fields WooCommerce
Edit, add new or hide unnecessary fields from the WooCommerce checkout form. Add pricing to fields and use conditional logic. It's all about conversions and better user experience. NEW: now you can set multiple conditions (OR) under one or more condition groups (AND).
💾 Active Installations: 90,000+ | WordPress Rating:
The plugin lets you add, remove, and manage existing WooCommerce checkout fields in minutes 💪! Read more about the extension ⬇️
Let's go back to the available checkout settings!
WooCommerce Checkout Settings
You can find them under the General, Tax, Payments, Accounts & Privacy, and Advanced tabs on the WooCommerce → Settings page.
Each section has settings that will affect the checkout page design.
General

Coupons Settings
Enable the use of coupon codes - select this option if you would like to create coupons that your customers can use when placing an order. If you turn on this feature, a coupon code field will appear on the cart and checkout pages.
Calculate coupon discounts sequentially - choose this feature if you want multiple coupons to lower the price discounted by the previous coupon rather than allowing multiple coupons to always lower the same value of the full price.
For example, your customer has received two coupons that they are using while placing an order:
- The full price of the ordered product is $100.
- The first one is a 10% off coupon, and the second one is 20% off.
- How we calculate the discount if we turn off the feature: $100 * 10% + $100 * 20% = $10 + $20. Therefore, the discount is $30 while the discounted product price is $70.
- How we calculate the discount if we turn on the feature: $100 * 10% + ($100 * 10%) * 20% = $10 + $18. Therefore, the discount is equal to $28 and the lowered price is $72.
Tax
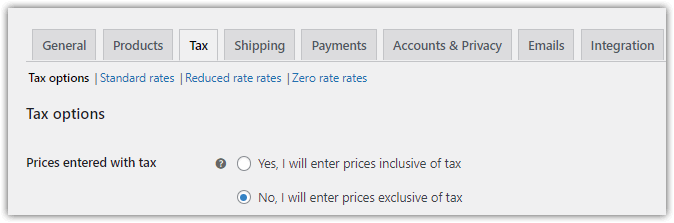
Prices settings
Display prices in the shop - decide if you want to show prices with or without tax.
Display prices during cart and checkout - choose if you want to display prices including or excluding tax in the cart and checkout pages.
Price display suffix - this setting is optional. You may set the price suffix that will appear next to the prices on the product and catalog pages. It will not affect the prices in the cart or checkout pages.
Shipping
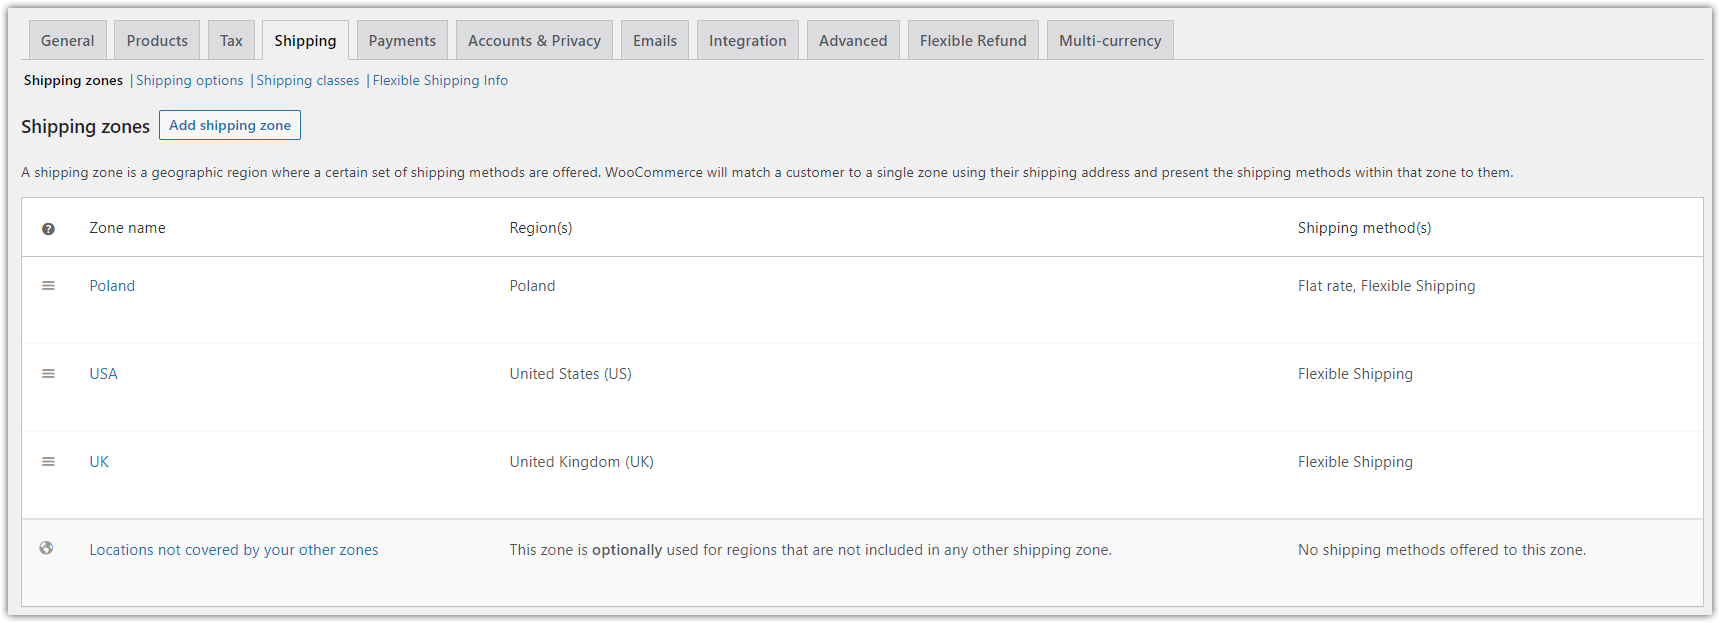
Here, you can configure the shipping zones, shipping methods, and costs that will appear on the checkout page.
Payments
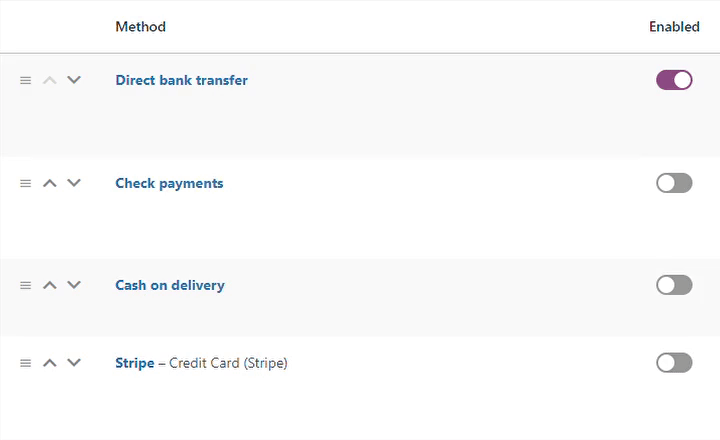
The table shows all the payment gateways that are available at your store. You can drag and drop the gateways to rearrange them. Also, you can press the name of a specific payment gateway to edit it.
When you install WooCommerce, you will find the following 4 available payment gateways, but of course, you can install more:
- Direct bank transfer (BACS)
- Check payments
- Cash on delivery
- PayPal
Accounts & Privacy
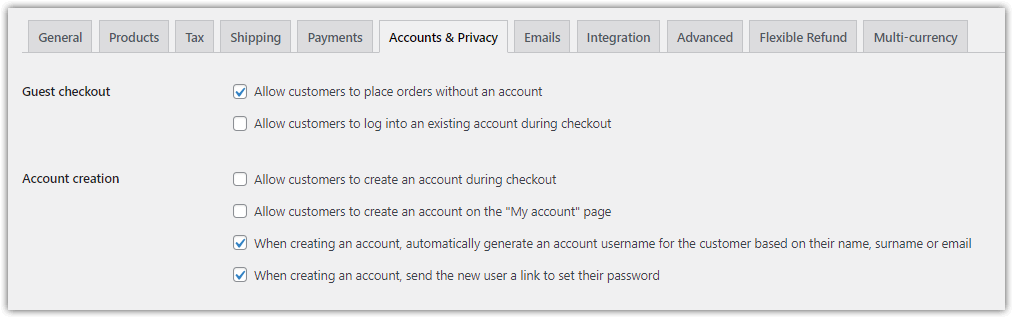
Guest checkout in WooCommerce settings
Allow customers to place orders without an account - enable this option if you want to allow for placing orders without creating an account. We suggest that you turn on this feature since many customers decide against buying if they need to set up an account. So, this option will turn on guest checkout in WooCommerce!
Allow customers to log into an existing account during checkout - enable existing users to speed up their shopping.
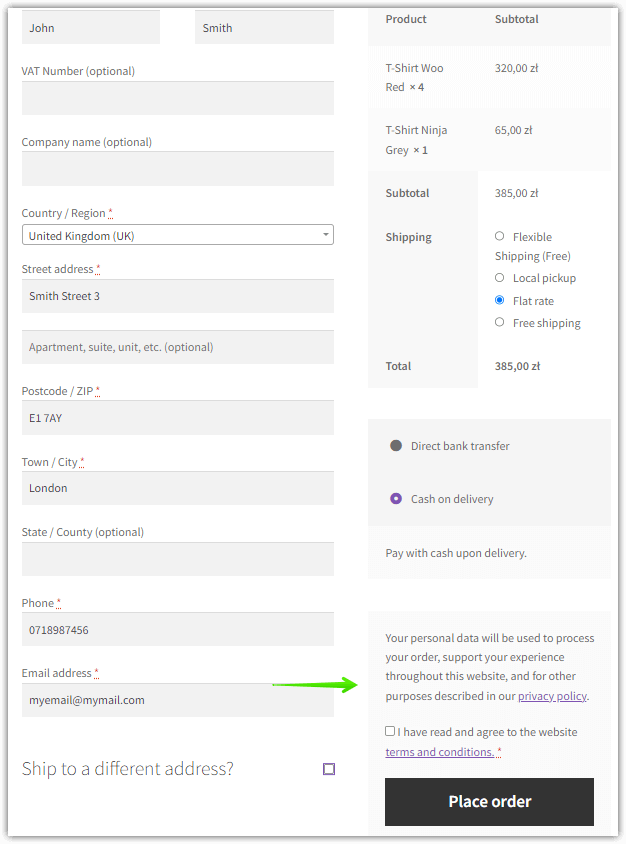
Please remember to set SSL for your WooCommerce so that orders go through a secure connection (https://). It's a must for virtually every online store nowadays.
Account creation settings
Allow customers to create an account during checkout - enable this option to let buyers create an account in your store during checkout.
Use additional settings to decide about account creation, the My Account page, and personal data removal.
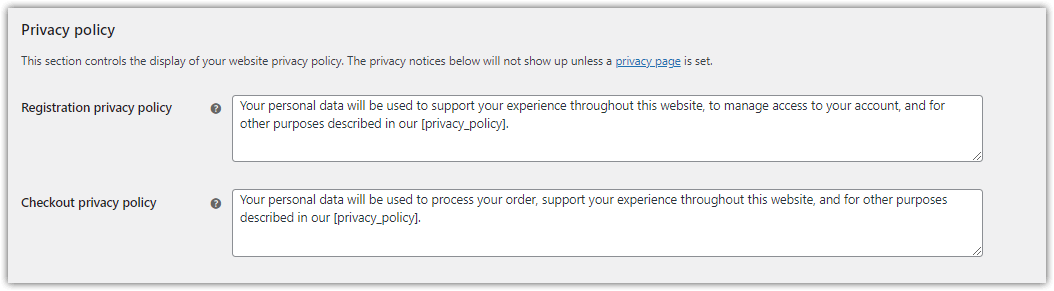
Privacy policy settings
You can also decide about the privacy policy information for WooCommerce registration and checkout.
Advanced
Page setup settings
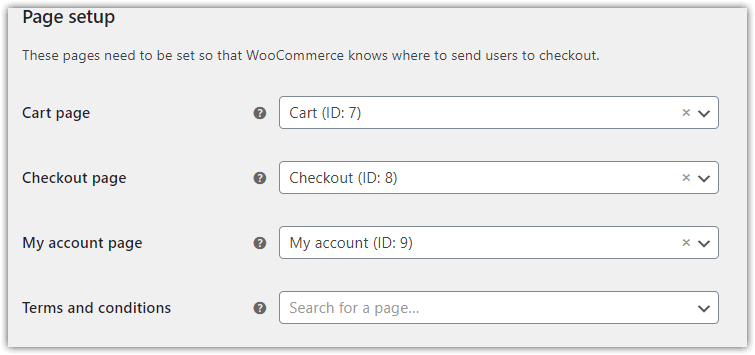
Cart page - select a page that you will use as the cart page. Then include the [ woocommerce_cart ] shortcode on one of your pages.
Checkout page - choose a specific page for the checkout page. Remember to add the [ woocommerce_checkout ] shortcode in the content of one WordPress page to show the WooCommerce checkout form.
My account page - select a page for the My account page and include the [woocommerce_my_account] shortcode on a page.
Terms and conditions - choose a page for the terms and conditions. You will require your customers to accept your terms and conditions before they can place an order.
Checkout endpoints settings
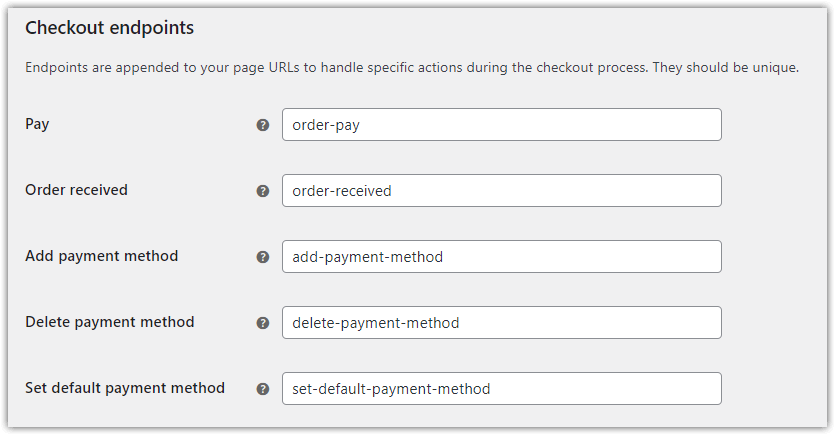
In this section, you need to define unique endpoints that will be added to the URL:
yourstorename.com/order/
Thanks to endpoints, each page will receive a unique URL. Remember not to use diacritics or spaces here. For example, the URL of a page on which you thank your customer for placing an order may look like this:
yourstorename.com/order/order-received/
Account endpoints settings
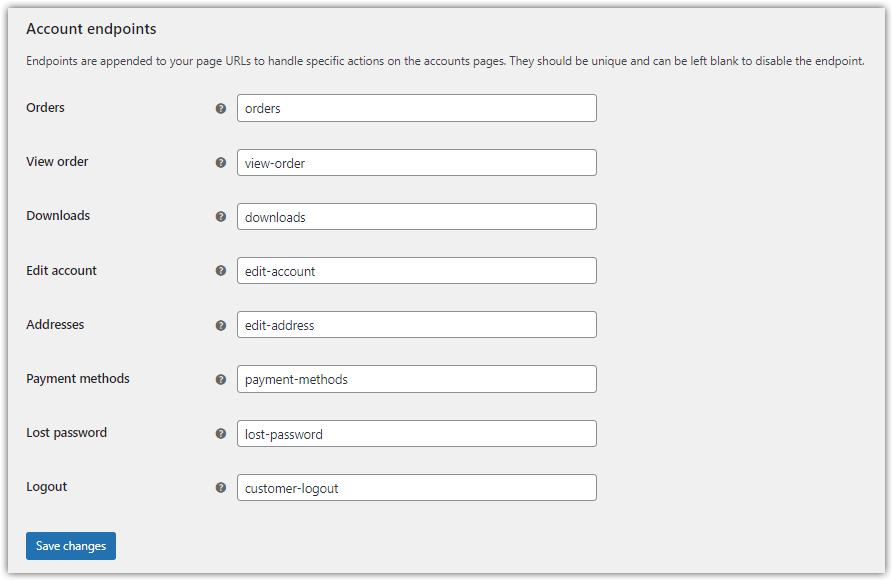
Similarly, you may change the default endpoints to the specific parts of the WooCommerce My account page.
How to manage WooCommerce checkout fields
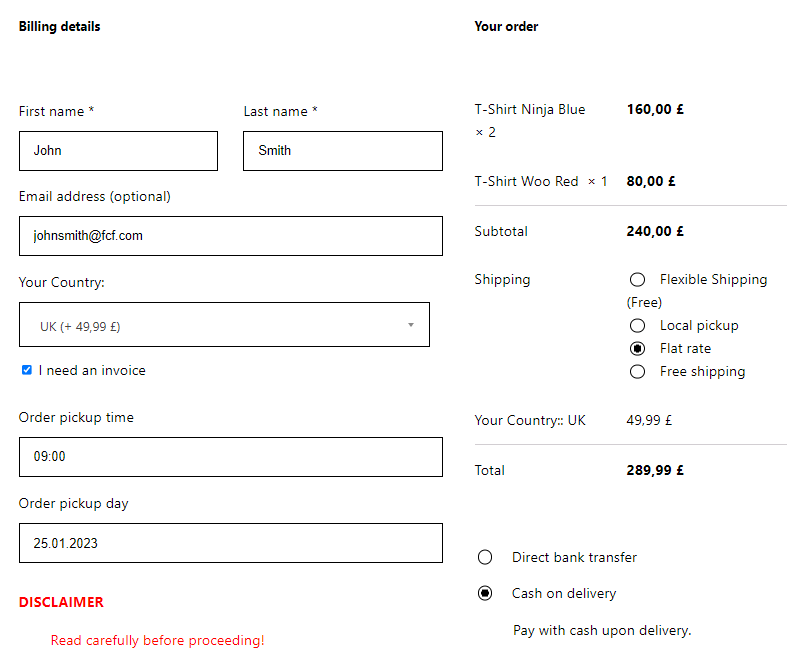
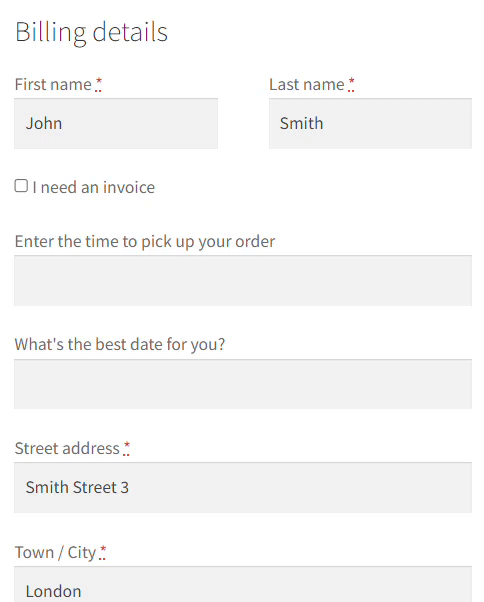
As you see WooCommerce checkout has a great experience out of the box, but there is one crucial feature missing. It is not possible to manage WooCommerce checkout fields. This is sometimes necessary to do.
🤔 Imagine that you only sell digital goods and you do not want to ask your customers for all address information. Just a name and an e-mail will do.
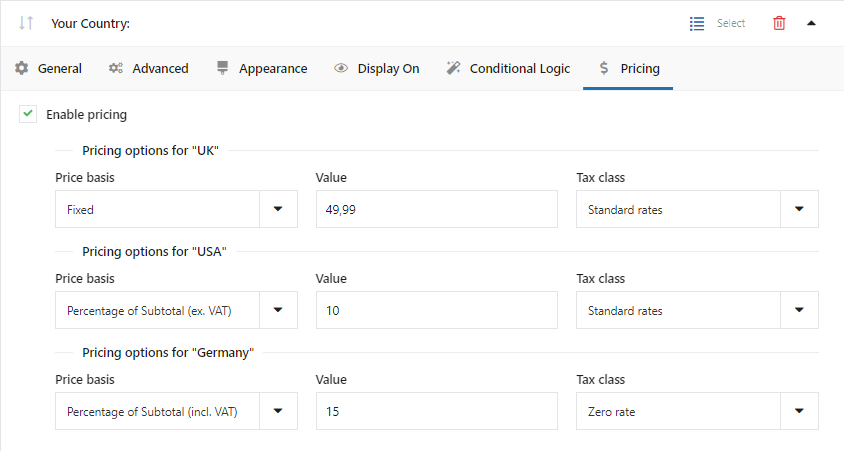
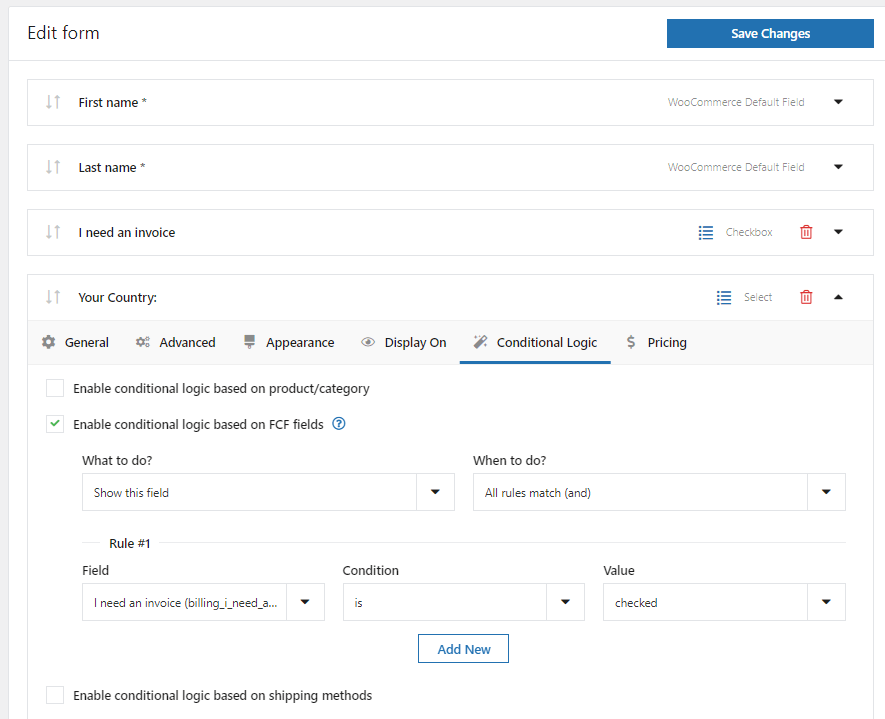
This means that you have to hide some fields, such as the address field. The bad news is that by default WooCommerce won't let you do that. The good news, on the other hand, is that the Flexible Checkout Fields plugin will come handy here. All you need to do is to decide which fields will be enabled in your checkout form:
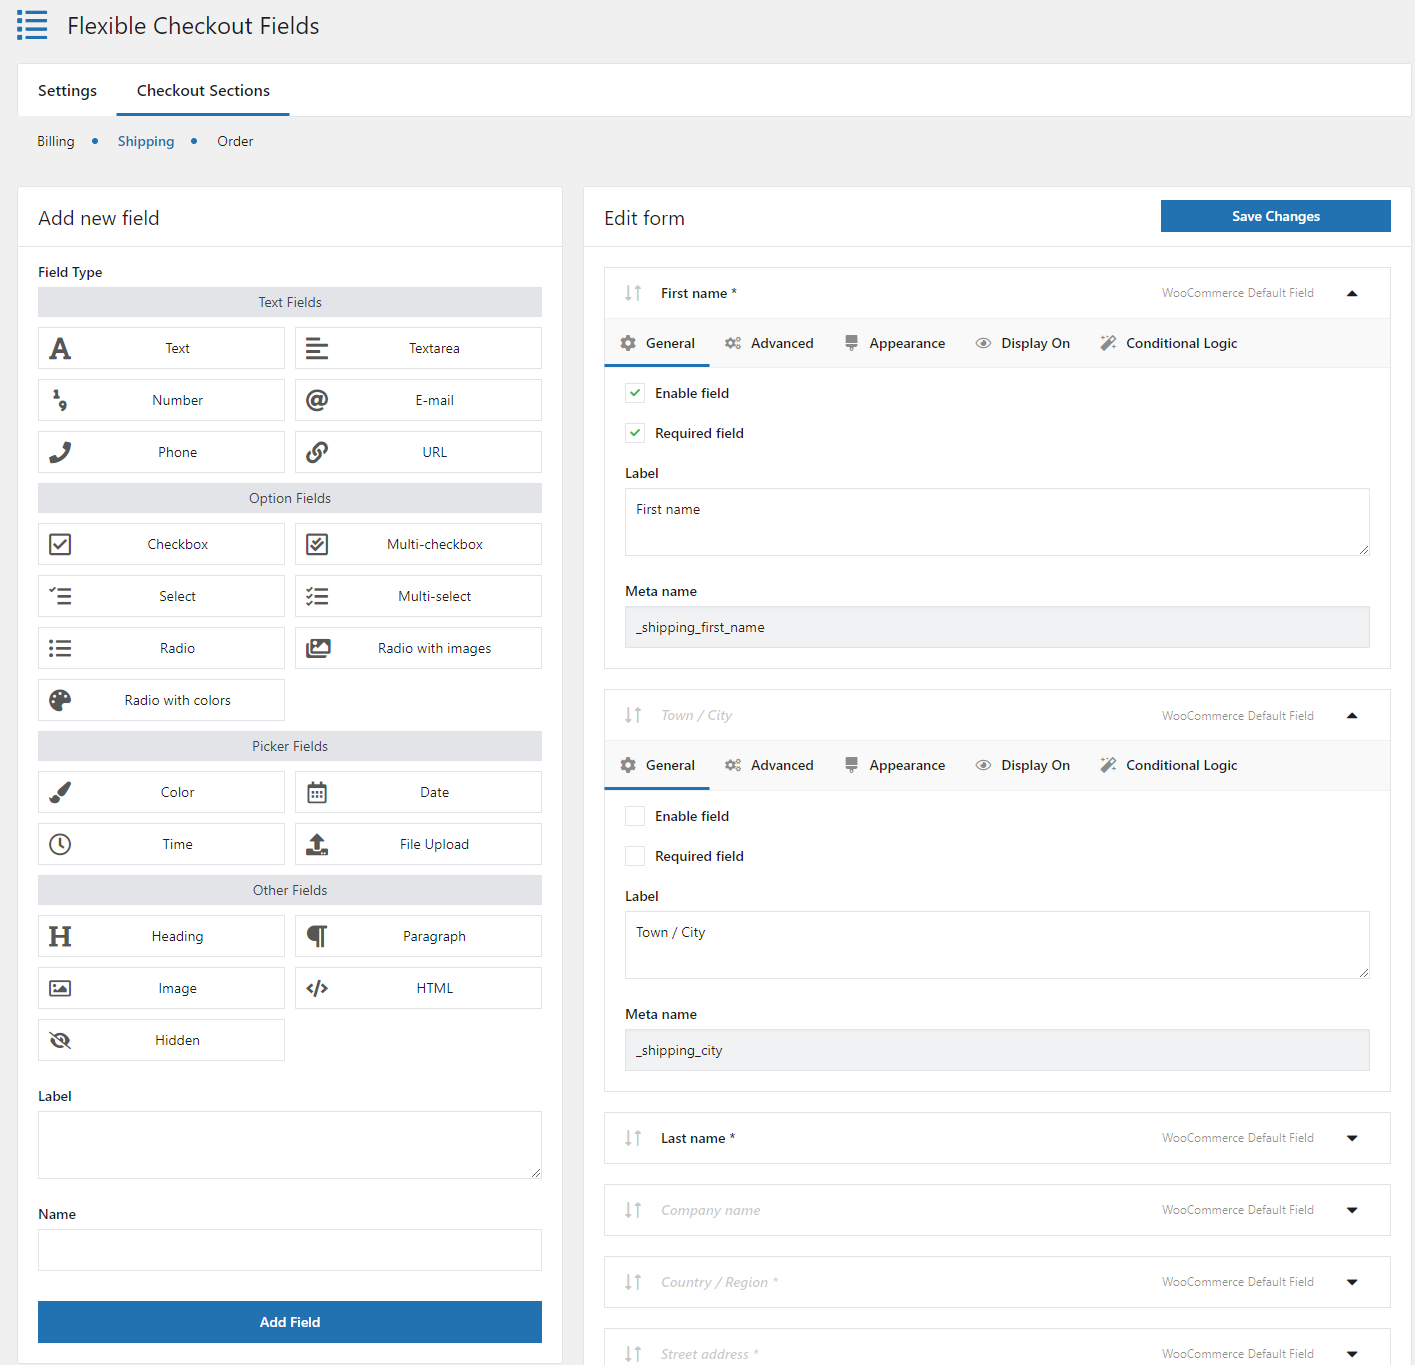
On the other hand, you may want to add some fields to the WooCommerce checkout. Let's say you want to collect some information about your customers, i.e. VAT number or what they do professionally.
Here at WP Desk, we get some very valuable information about our customers that we use to streamline our plugin experience, how do our customers use the plugins:
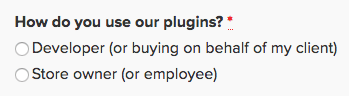
👉🏻 By asking this question we know who are our customers and what's more important how much each group spends and how much revenue we make.
This simple but powerful feature is unfortunately not available in WooCommerce.
Get a FREE plugin for managing WooCommerce checkout fields
When we first started using WooCommerce we were certain that managing checkout fields would be a crucial feature and we created a plugin for that: Flexible Checkout Fields.
Flexible Checkout Fields WooCommerce
Edit, add new or hide unnecessary fields from the WooCommerce checkout form. Add pricing to fields and use conditional logic. It's all about conversions and better user experience. NEW: now you can set multiple conditions (OR) under one or more condition groups (AND).
💾 Active Installations: 90,000+ | WordPress Rating:
Watch this video to check what the free version can do:
The checkout manager is available both in the free and in the PRO version.
Customize WooCommerce checkout page design (free plugin)
Start with the free version of the plugin!
Summary
Today, you've learned how to set up the WooCommerce checkout page and customize the checkout design and its fields with a plugin!
If you have any questions contact us!
More about WooCommerce settings and checkout
-
Customize WooCommerce checkout for free

WooCommerce checkout hooks. A visual guide with examples. Everything you should know about WooCommerce hooks. -
WooCommerce checkout email validation
The checkout field validation. Read more about how to set your own validation rules. With our guide, it's never been easier.
