Learn about advanced settings and how to configure new product fields in WooCommerce!
Contents
Plugin FAQ
✅ Flexible Product Fields FAQ →
Getting Started
- The plugin supports the following product types:
- simple
- variable
- group
- external/affiliate
- and drafts
- New fields added with Flexible Product Fields are displayed in WooCommerce on the product pages.
- The product must have a price, to make the fields appear on its page.
- Each product can be assigned to multiple groups and each group can be assigned to a chosen product or product category.
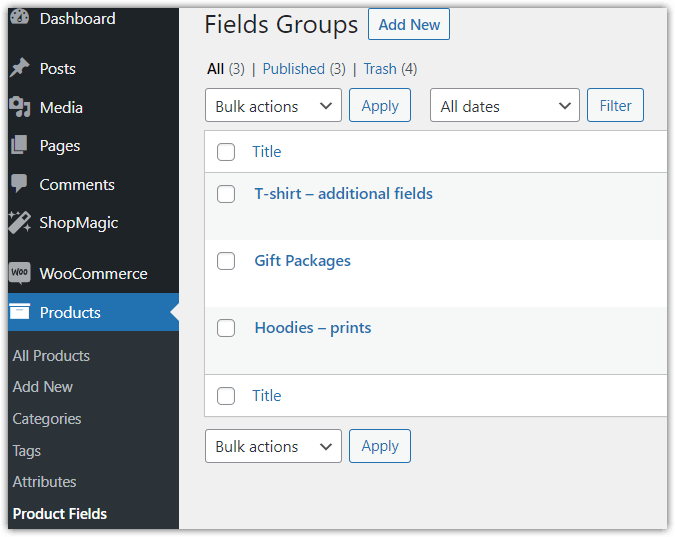
- Plugin settings can be found in the Products menu → Product Fields.
- To add a new group, click Add New next to the Fields Groups header.
Product page and checkout
All fields appear on the product page in the selected section and order.
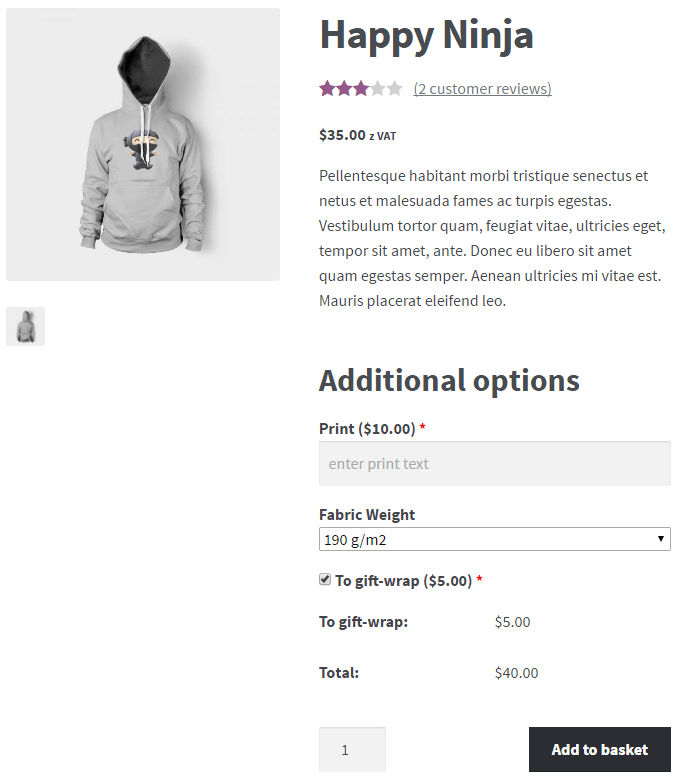
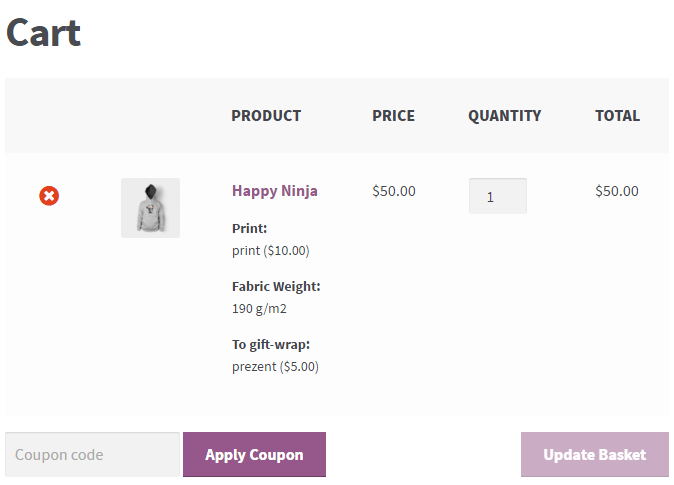
Options entered or selected by the customer will appear in the cart and checkout similar to the attributes of the variable product. Product price will include the regular price of the product and the price options selected.
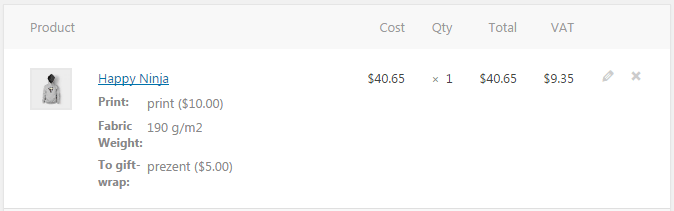
Additional fields will also be available for admins and shop managers on the orders list and edit order pages.
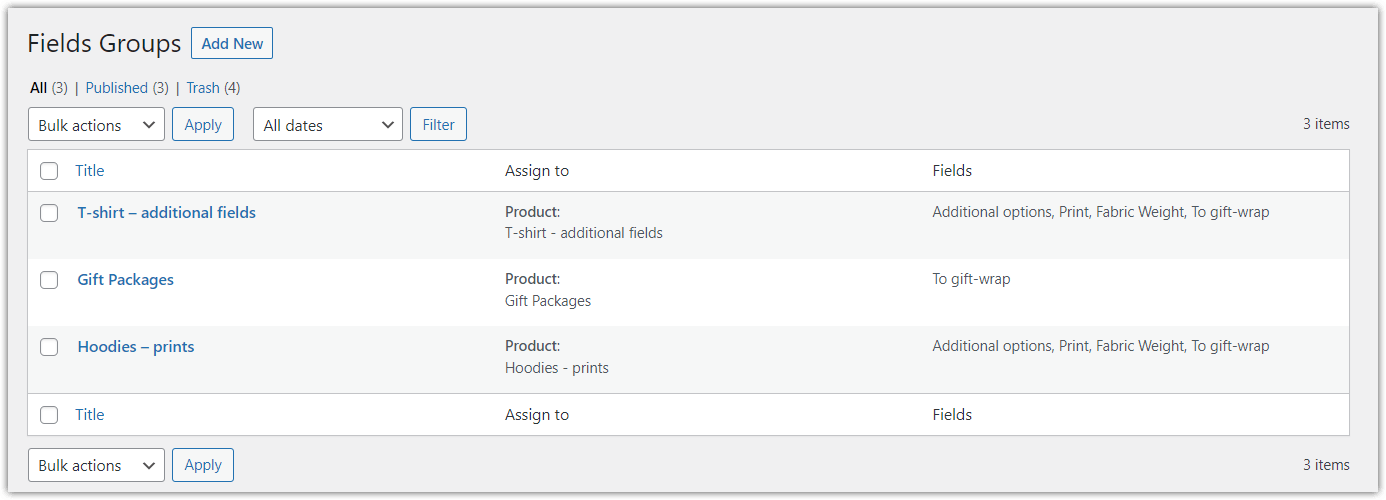
Fields Groups List
The Groups' Fields table gives an overview of the configured and active groups and an ability to edit, duplicate, delete, and search. The table contains the following information:
Title
Group title only serves as an identification of a group for the admin.
Assign to
Information as to which product or category the group has been assigned.
Fields
Information about all the fields used in the group.
Screen Options
To hide unnecessary columns, click the Screen Options in the upper right corner of the screen and select the columns.
Edit
To edit a group simply click its title or hover over the title area, and click the Edit in the quick links menu.
PRO Duplicate
You can copy groups. After hovering over the title area, click Duplicate in the menu of quick links, and you will create a copy of a selected field group.
Trash
You can delete groups individually via quick links or mass selecting group and from Bulk Actions selecting Move to Trash.
To permanently delete a group, select the filter Trash, and then click Delete Permanently.
Search
To search groups type their title in the box in the upper right corner of the screen and click the Search Fields Group.
You can also filter a group by Published, Draft - no active groups and located in the Trash.
Fields Group Configuration
To add a new group:
- First, click Add New in the upper left corner of the screen.
- Then, enter a title for the group, which will be visible only to the store admin.
- After configuring fields, save the settings by clicking Publish.
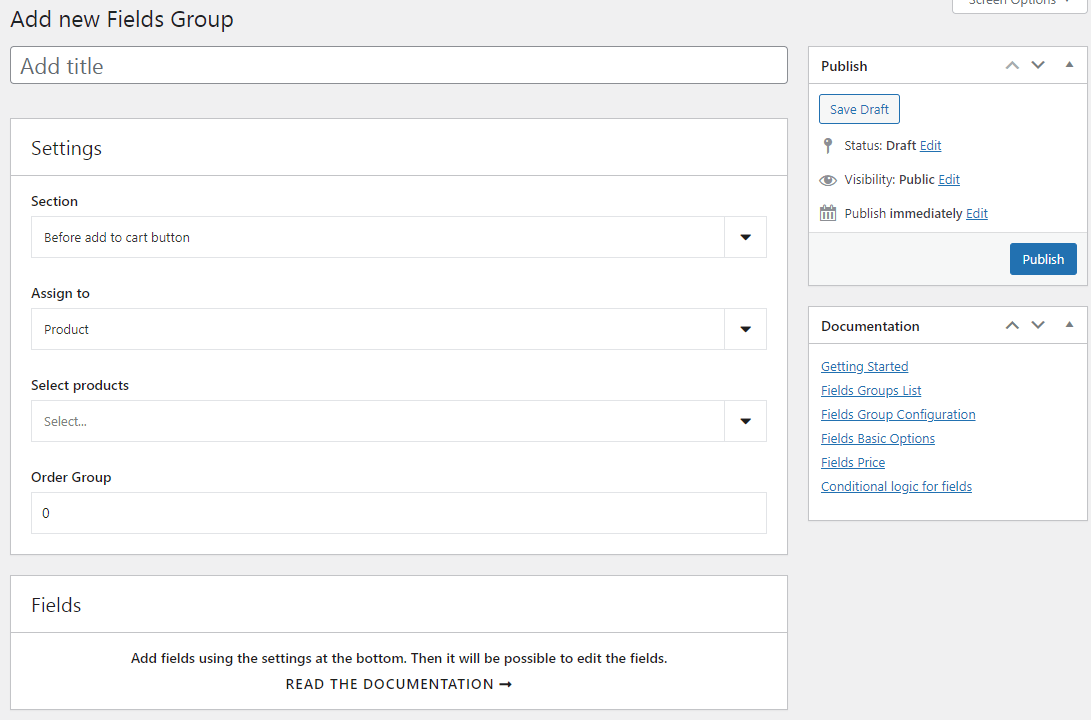
Settings
Settings metabox contains general options for the entire group.
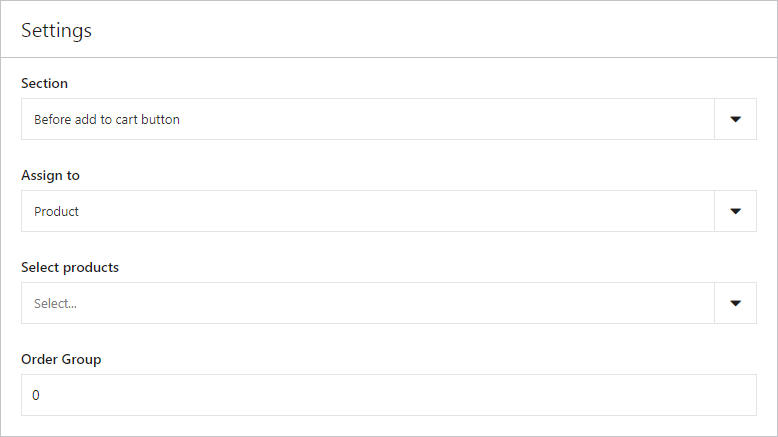
Section
Select where the fields will appear on the product page. You can choose one of the two sections:
- Before add to cart button,
- After add to cart button.
Assign this group to
Additional fields can be assigned to:
- selected products,
- PRO selected variations,
- PRO selected categories,
- PRO selected tags,
- PRO all products.
After choosing one of the options in the Select... search for a product, category, or tag. You can add multiple products, categories, and tags to a group.
PRO Order Group
If you want to make a few groups of fields added to a product you can set the display order of fields in the group.
By default (in the free version) the fields will appear by the order of creating groups.
Support for WooCommerce Blocks
Flexible Product Fields allows you to add a group of fields using the theme block editor, which you can find under Appearance → Editor. You can also access it directly at this URL (paste it into your browser’s address bar, after your store’s domain): /wp-admin/site-editor.php
Fields
Add fields in Fields metabox will appear on the product page.
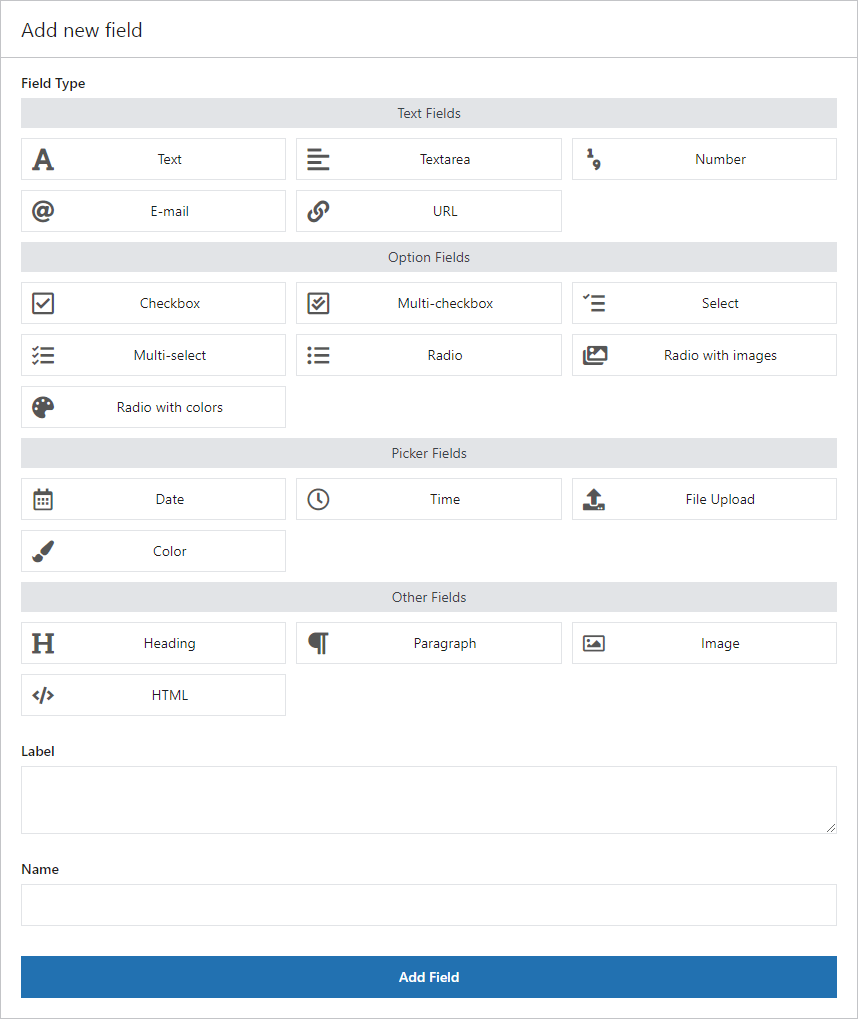
Sort fields using drag and drop, edit by clicking the field title, or click Delete to remove the field.
Basic options
Depending on the field type selected, various configuration options will be available.
Label
The field label will appear on the product page.
Required
Checking this option will make the field required. If the field is not completed by the client, an error message appears and he cannot add a product to the cart.
Also, if the field is required, the asterisk "*" will appear next to its name.
Character Limit
For the Text and Textarea field, you can set the maximum number of characters to enter on the product page.
Placeholder
The placeholder will appear as a help in text fields.
Value
The entered value is only visible for store admin and displays i.e. in the order edit page if the customer selects one option.
CSS Class
You can modify the appearance of the fields on the product page by adding your own CSS class.
Tooltip
The description will appear when the user hovers the cursor over the [?] icon next to the field label.
Value
The entered value is only visible for store admin and displays i.e. in the order edit page if the customer selects that option.
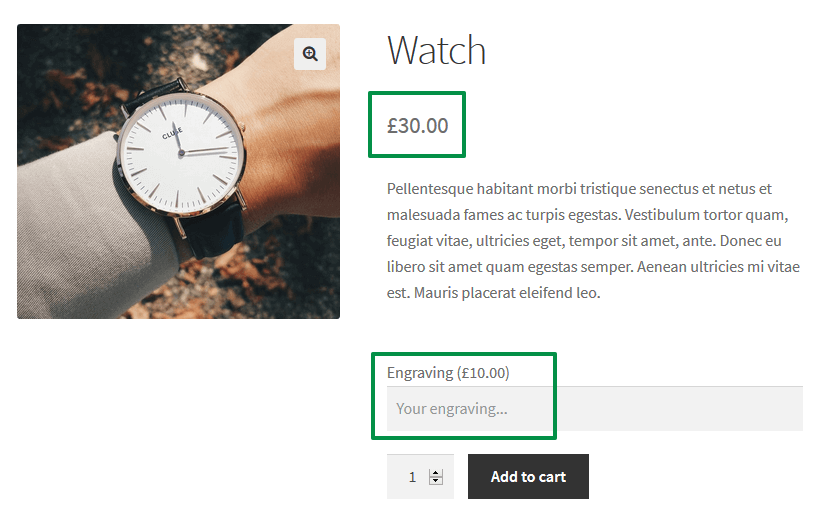
Price
The plugin allows you to increase or decrease the price of the product of the values set for the field.
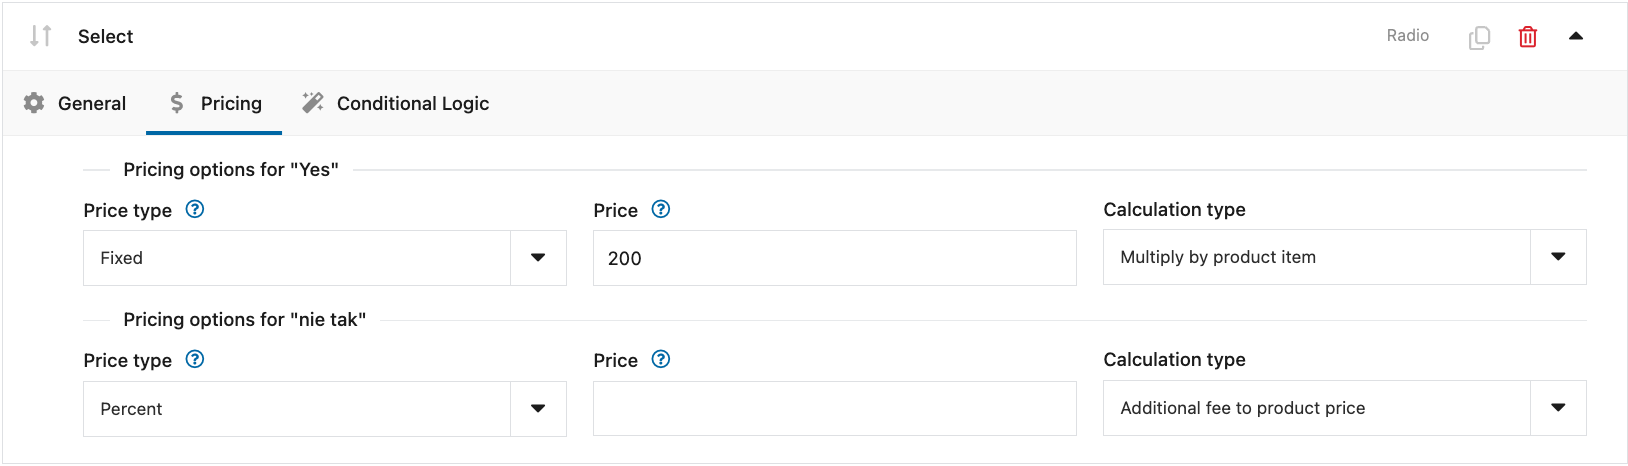
‘PRO’ Price calculation method
- Multiplied by product items - the field price will be multiplied by the number of units of the product,
- Addditional fee to product price - the price of the field will be added once to the product price, regardless of the quantity,
- Based on dimension (Flexible Quantity) - the price of the field will be multiplied by the measurement provided by Flexible Quantity.
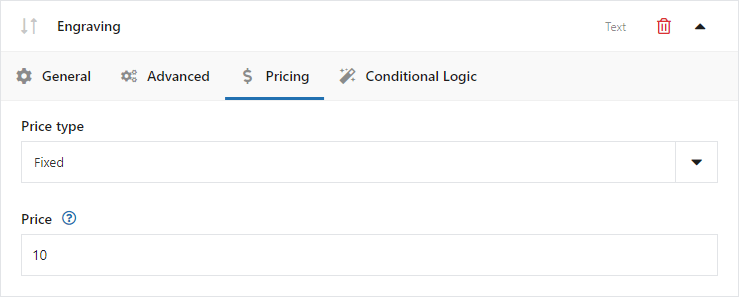
PRO Price type
For selected types of fields, you can add extra fees that will be added to the product price. You can choose the method of calculating the rates for additional options:
- Fixed - set a fixed price for options,
- Percent - set the percentage of the product price for the option.
PRO Price
Depending on the price type, enter a value in the currency of the store or the percentage to calculate the price based on the price of the product.
The plugin is compatible with some popular currency switchers:
- Multi Currency for WooCommerce
- Currency Switcher for WooCommerce
- WooCommerce Currency Switcher
It means that the price assigned to the field will change together with the change of currency in the store.
More information is available on our blog:
Change currency per WooCommerce product (with custom fields support)
Conditional logic for fields
PRO Conditional logic for fields allows showing fields based on values from other fields:
- Checkbox
- Radio
- Select
- Radio with images
- Radio with colors
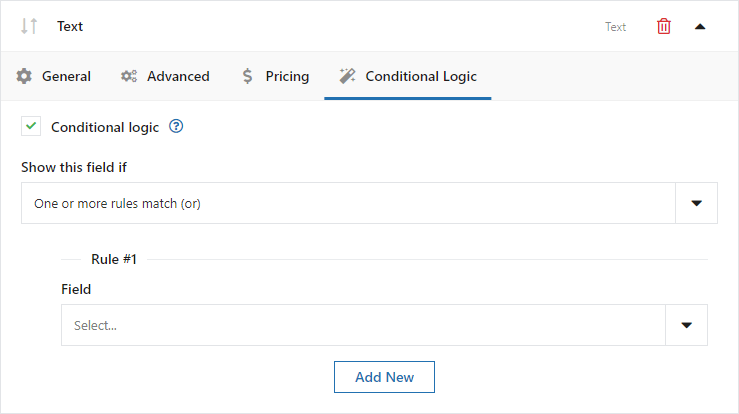
Choose a way to check the rules:
- all rules match (and),
- one or more rules match (or).
Then add the rule and select the field to set the condition and the condition:
- is,
- is not.
The checkbox will have two settings: checked and unchecked.
The available settings for the remaining fields will be the same as the options set for those fields.
You can add any number of rules.
Field types
Text Fields
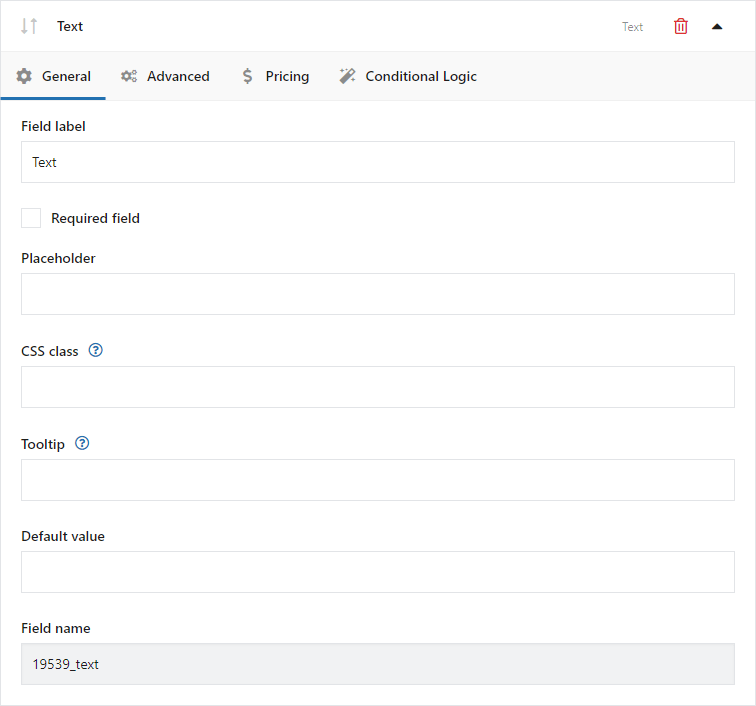
Text
Example of the field type on the product page:
Configuration:
Field label
The field label will appear on the product page.
Required
Checking this option will make the field required. If the field is not completed by the client, an error message appears and he cannot add a product to the cart.
If the field is required, an asterisk “*” will appear next to its name.
Placeholder
The placeholder will appear as a help inside the field.
CSS Class
You can modify the appearance of the fields on the product page by adding your own CSS class.
Tooltip
The description will appear when the user hovers the cursor over the [?] icon next to the field label.
PRO Default value
Enter the value of the option to be set as default.
Character Limit
You can set the maximum number of characters to enter on the product page.
Textarea
Example of the field type on the product page:
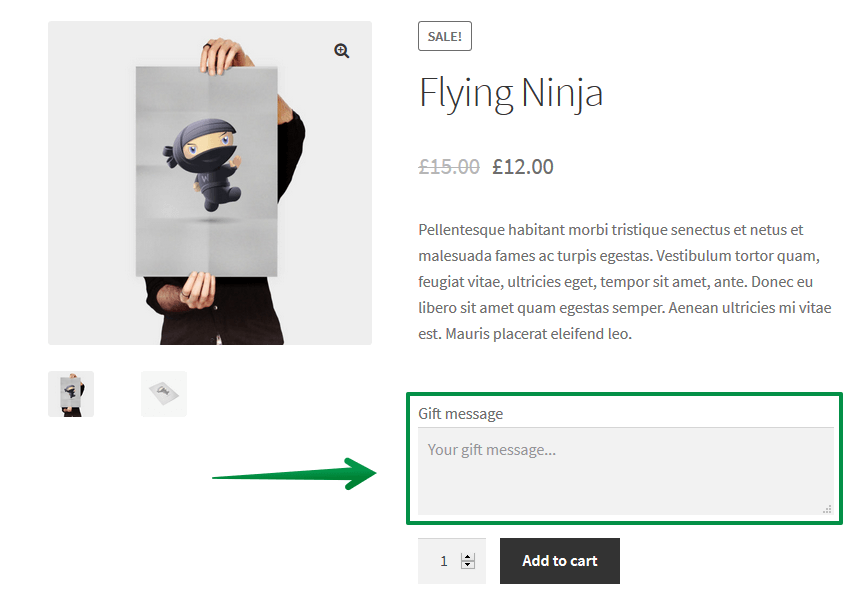
Configuration:
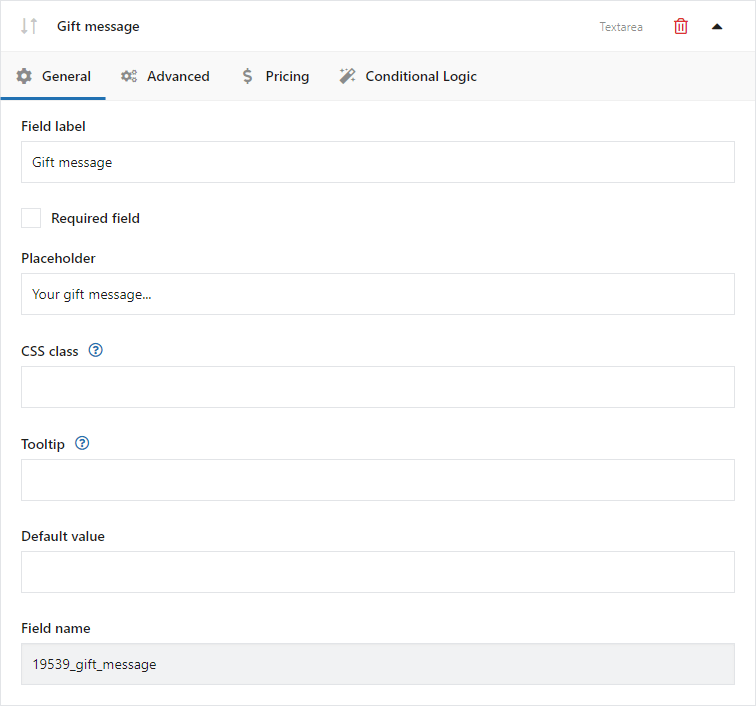
Field label
The field label will appear on the product page.
Required
Checking this option will make the field required. If the field is not completed by the client, an error message appears and he cannot add a product to the cart.
If the field is required, an asterisk "*" will appear next to its name.
Placeholder
The placeholder will appear as a help inside the field.
CSS Class
You can modify the appearance of the fields on the product page by adding your own CSS class.
Tooltip
The description will appear when the user hovers the cursor over the [?] icon next to the field label.
PRO Default value
Enter the value of the option to be set as default.
Character Limit
You can set the maximum number of characters to enter on the product page.
Number
Example of the field type on the product page:

Configuration:
Field label
The field label will appear on the product page.
Required
Checking this option will make the field required. If the field is not completed by the client, an error message appears and he cannot add a product to the cart.
If the field is required, an asterisk "*" will appear next to its name.
Placeholder
The description will appear as the first option to choose from a dropdown list (e.g. "Select from list"). The option will be inactive and not clickable.
CSS Class
You can modify the appearance of the fields on the product page by adding your own CSS class.
Tooltip
The description will appear when the user hovers the cursor over the [?] icon next to the field label.
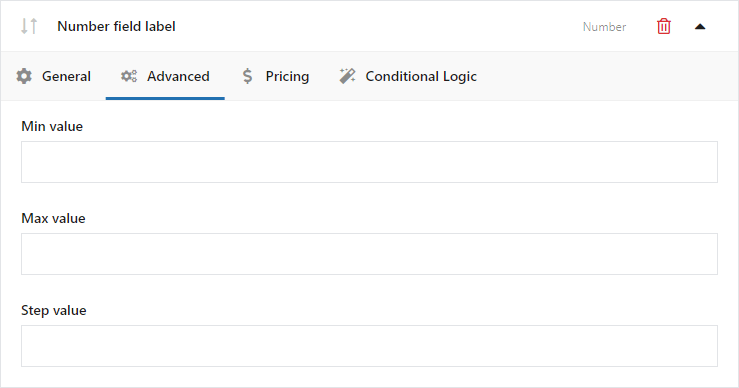
Min value
Values below the minimum value will be rejected due to field validation.
Max value
Values below the minimum value will be rejected due to field validation.
Step value
The interval between consecutive acceptable values.
Example of the field type on the product page:
Configuration:
Field label
The field label will appear on the product page.
Required
Checking this option will make the field required. If the field is not completed by the client, an error message appears and he cannot add a product to the cart.
If the field is required, an asterisk “*” will appear next to its name.
Placeholder
The placeholder will appear as a help inside the field.
CSS Class
You can modify the appearance of the fields on the product page by adding your own CSS class.
Tooltip
The description will appear when the user hovers the cursor over the [?] icon next to the field label.
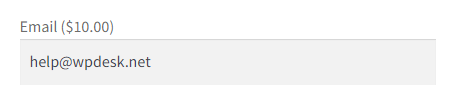
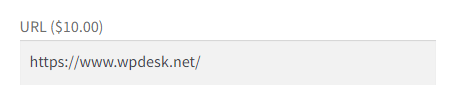
URL
Example of the field type on the product page:
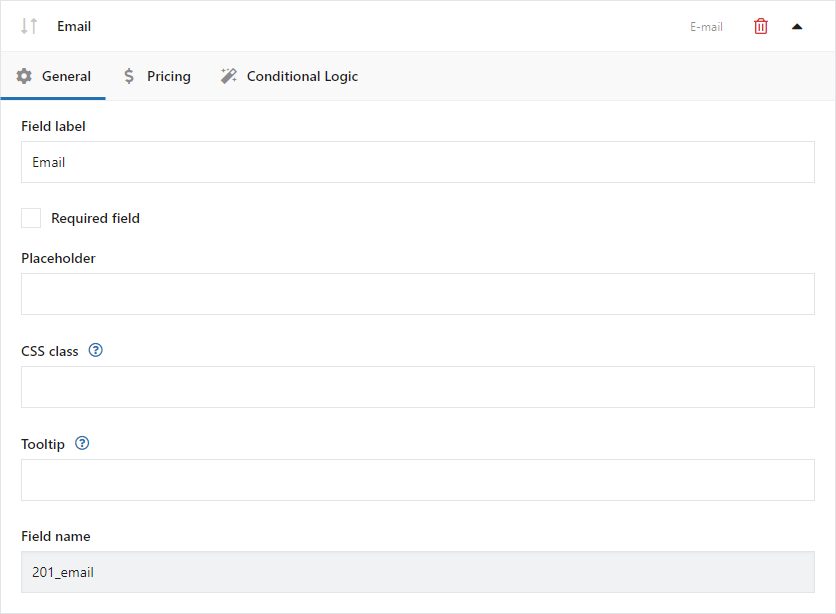
Configuration:
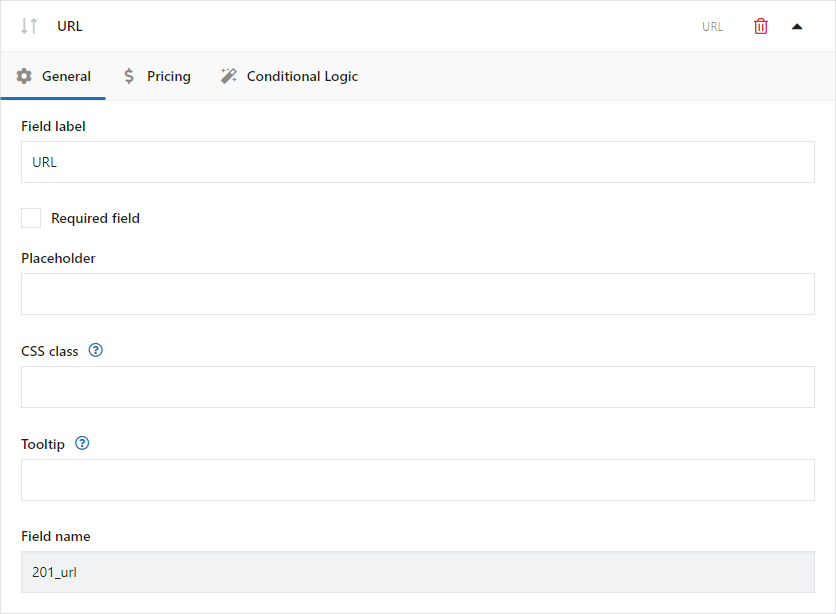
Field label
The field label will appear on the product page.
Required
Checking this option will make the field required. If the field is not completed by the client, an error message appears and he cannot add a product to the cart.
If the field is required, an asterisk “*” will appear next to its name.
Placeholder
The placeholder will appear as a help inside the field.
CSS Class
You can modify the appearance of the fields on the product page by adding your own CSS class.
Tooltip
The description will appear when the user hovers the cursor over the [?] icon next to the field label.
Option Fields
Checkbox
Example of the field type on the product page:
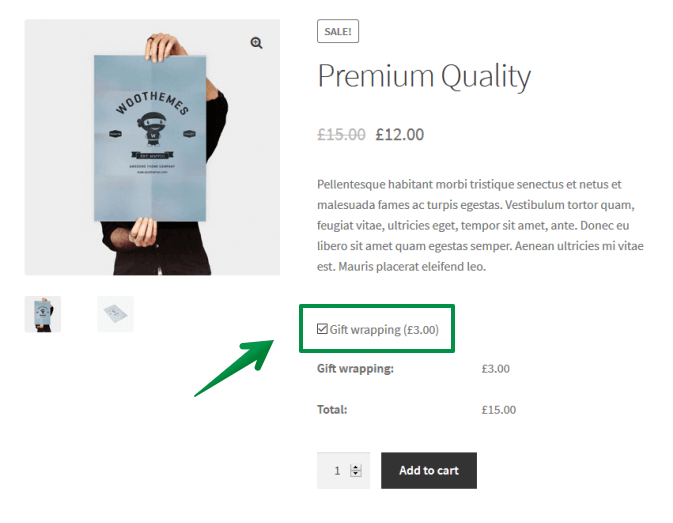
Configuration:
Field label
The field label will appear on the product page.
Required
Checking this option will make the field required. If the field is not completed by the client, an error message appears and he cannot add a product to the cart.
If the field is required, an asterisk "*" will appear next to its name.
Checked by default
Select this option to have the checkbox checked by default.
Value
The entered value is only visible for store admin and displays i.e. in the order edit page if the customer selects one option.
CSS Class
You can modify the appearance of the fields on the product page by adding your own CSS class.
Tooltip
The description will appear when the user hovers the cursor over the [?] icon next to the field label.
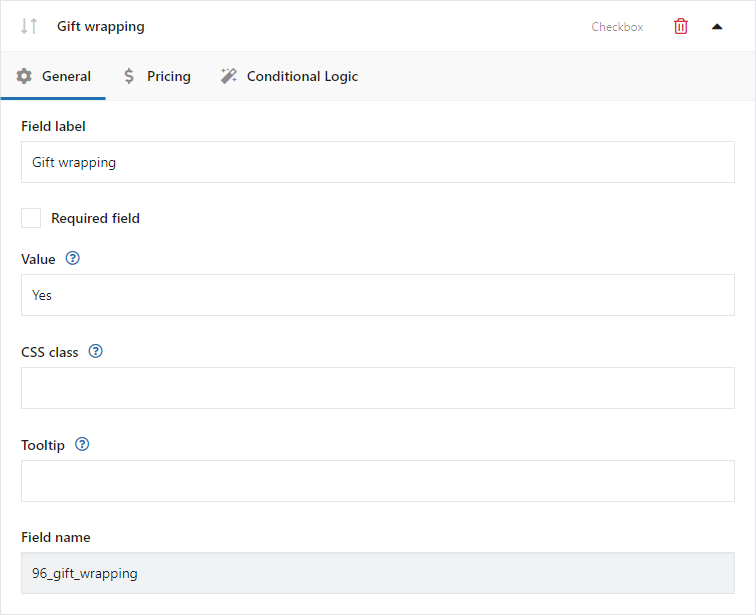
Toggle
Example of the field type on the product page:

Configuration:
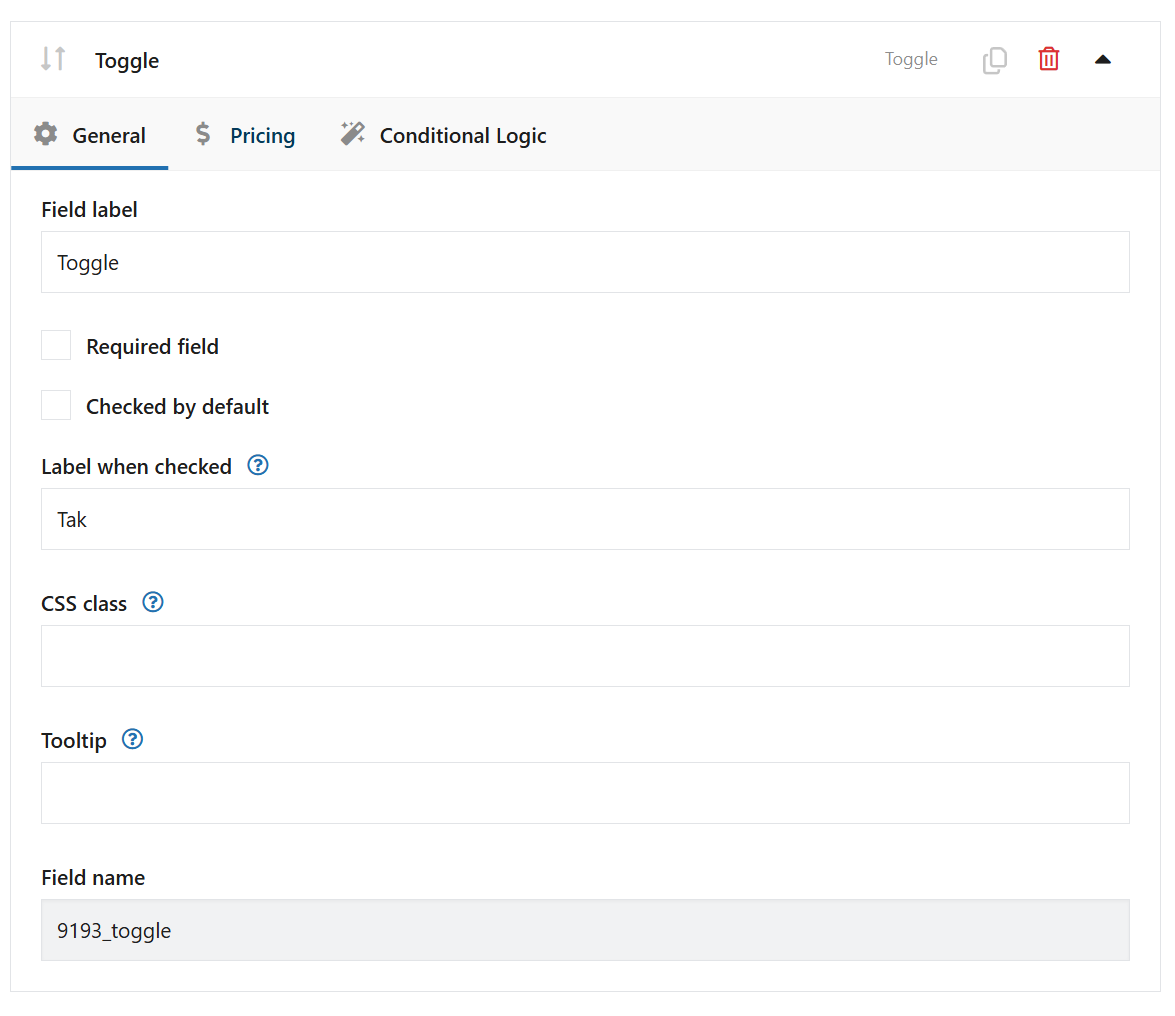
Field label
The field label will appear on the product page.
Required
Checking this option will make the field required. If the field is not completed by the client, an error message appears and he cannot add a product to the cart.
If the field is required, an asterisk "*" will appear next to its name.
Checked by default
Select this option to have the toggle in the 'on' position by default.
Label when checked
Enter the text that will appear next to the label when the user selects this field. The text will be visible, e.g. in the Cart, instead of the selected box.
CSS Class
You can modify the appearance of the fields on the product page by adding your own CSS class.
Tooltip
The description will appear when the user hovers the cursor over the [?] icon next to the field label.
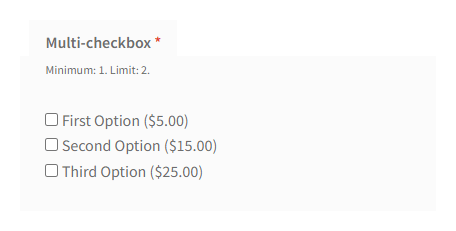
Multi-checkbox
Example of the field type on the product page:
Configuration:
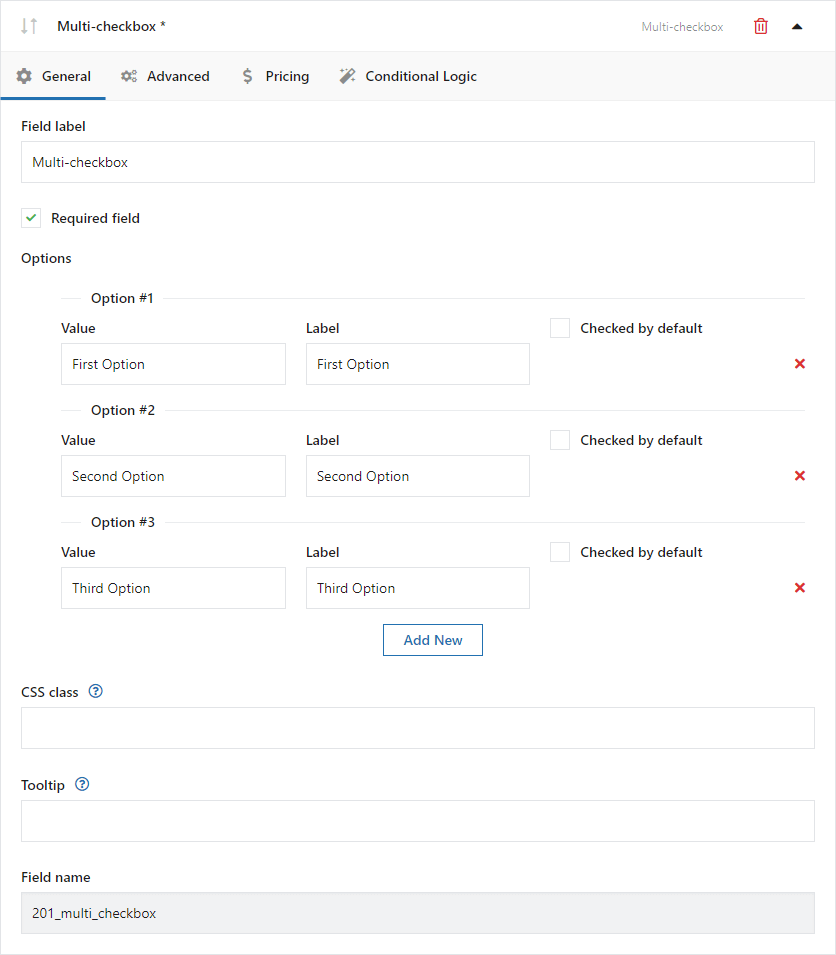
Field label
The field label will appear on the product page.
Required
Checking this option will make the field required. If the field is not completed by the client, an error message appears and he cannot add a product to the cart.
If the field is required, an asterisk "*" will appear next to its name.
Value
The entered value is only visible for store admin and displays i.e. in the order edit page if the customer selects that option.
Label
The option label will appear on the product page.
Checked by default
Select this option to have the checkbox checked by default.
CSS Class
You can modify the appearance of the fields on the product page by adding your own CSS class.
Tooltip
The description will appear when the user hovers the cursor over the [?] icon next to the field label.
Minimum of selected values
Set the minimum number of selections required. Check the "Required field" option in the "General" tab for the following setting to work.
Maximum number of selected values
Set the maximum number of selections allowed.
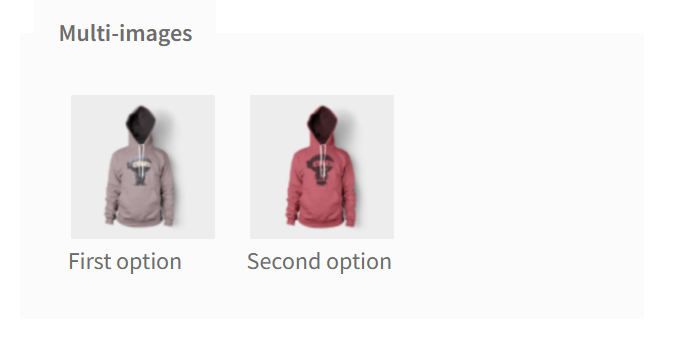
Multi-images
Example of the field type on the product page:
Configuration:
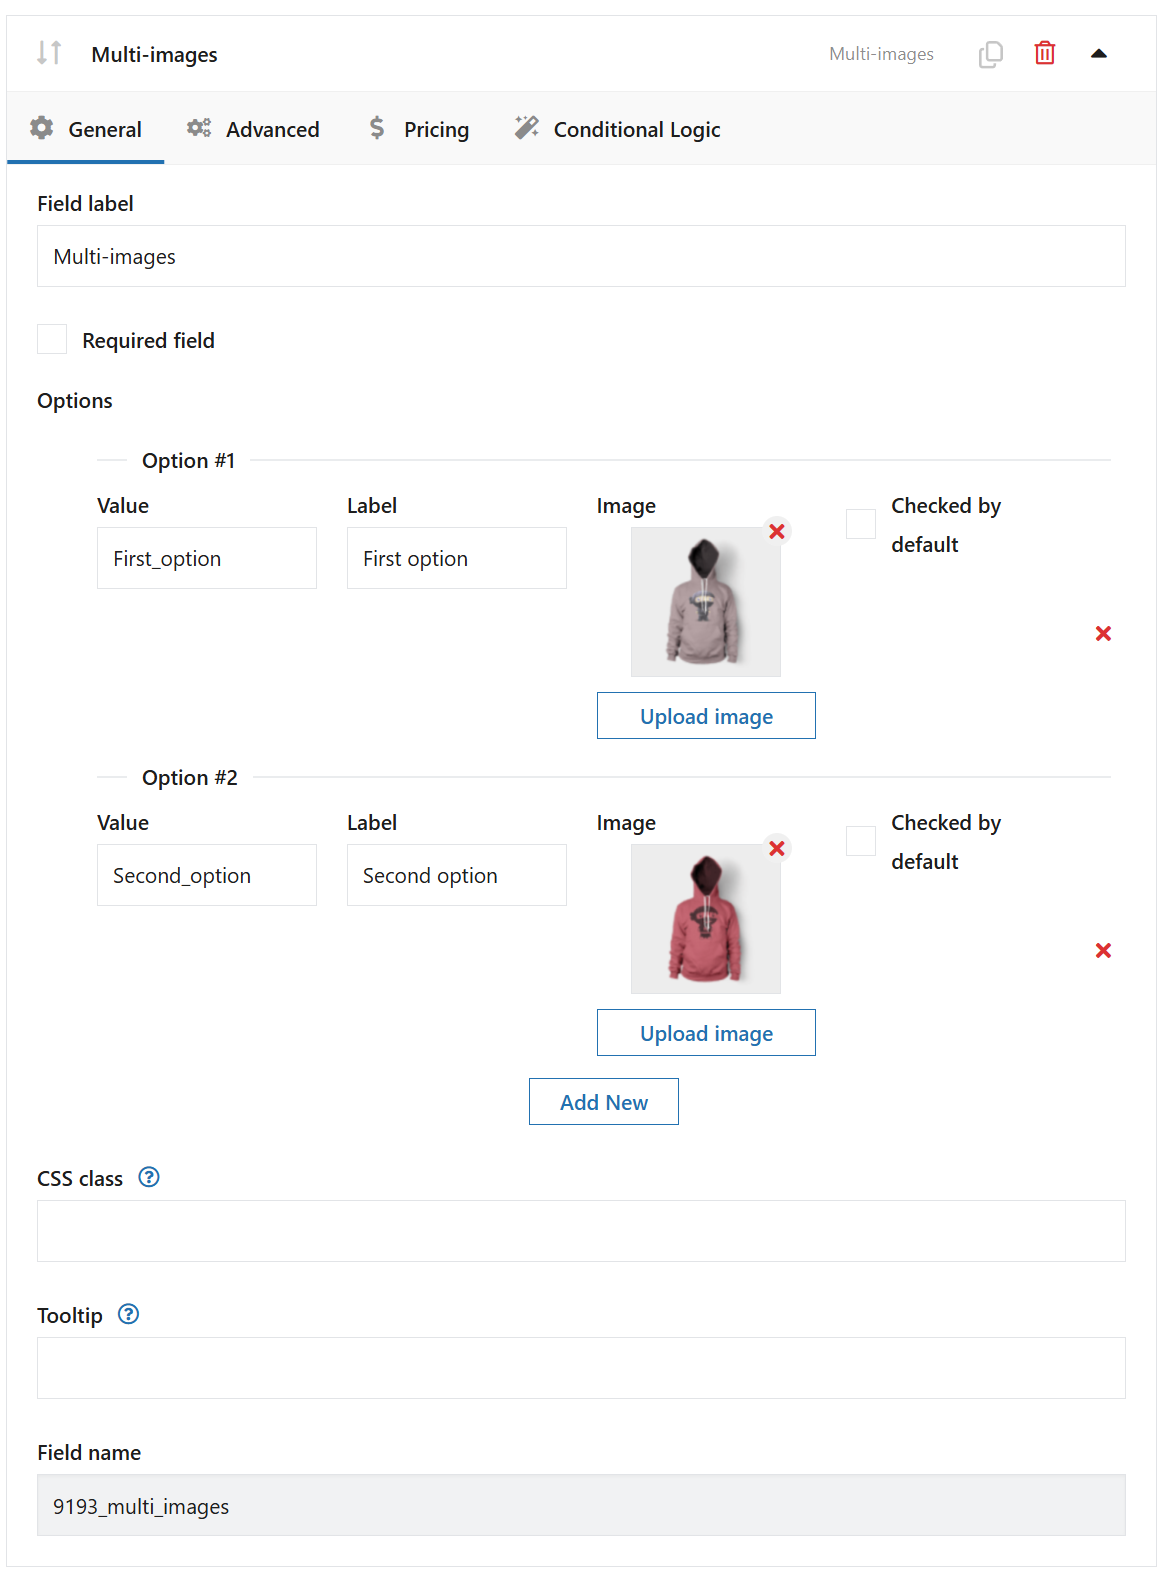
Field label
The field label will appear on the product page.
Required
Checking this option will make the field required. If the field is not completed by the client, an error message appears and he cannot add a product to the cart.
If the field is required, an asterisk "*" will appear next to its name.
Value
The entered value is only visible for store admin and displays i.e. in the order edit page if the customer selects that option.
Label
The option label will appear on the product page.
Checked by default
Select this option to have the checkbox checked by default.
CSS Class
You can modify the appearance of the fields on the product page by adding your own CSS class.
Tooltip
The description will appear when the user hovers the cursor over the [?] icon next to the field label.
Advanced:
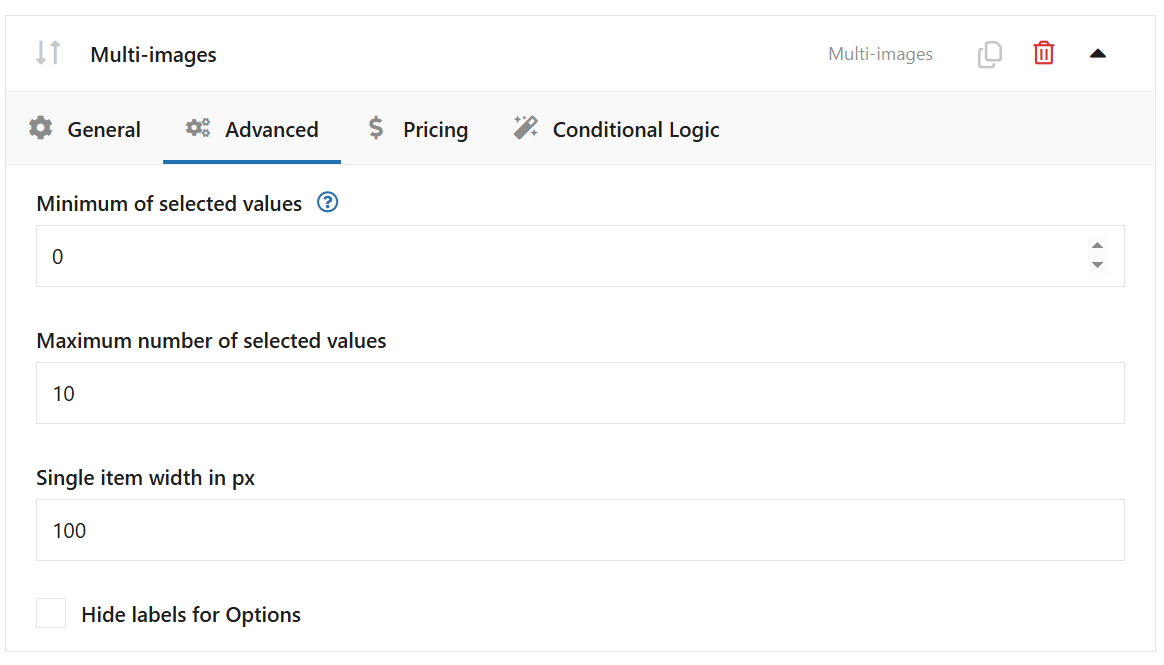
Minimum of selected values
Set the minimum number of selections required. Check the "Required field" option in the "General" tab for the following setting to work.
Maximum number of selected values
Set the maximum number of selections allowed.
Single item width in px
Set the width of the single image.
Select
Example of the field type on the product page:
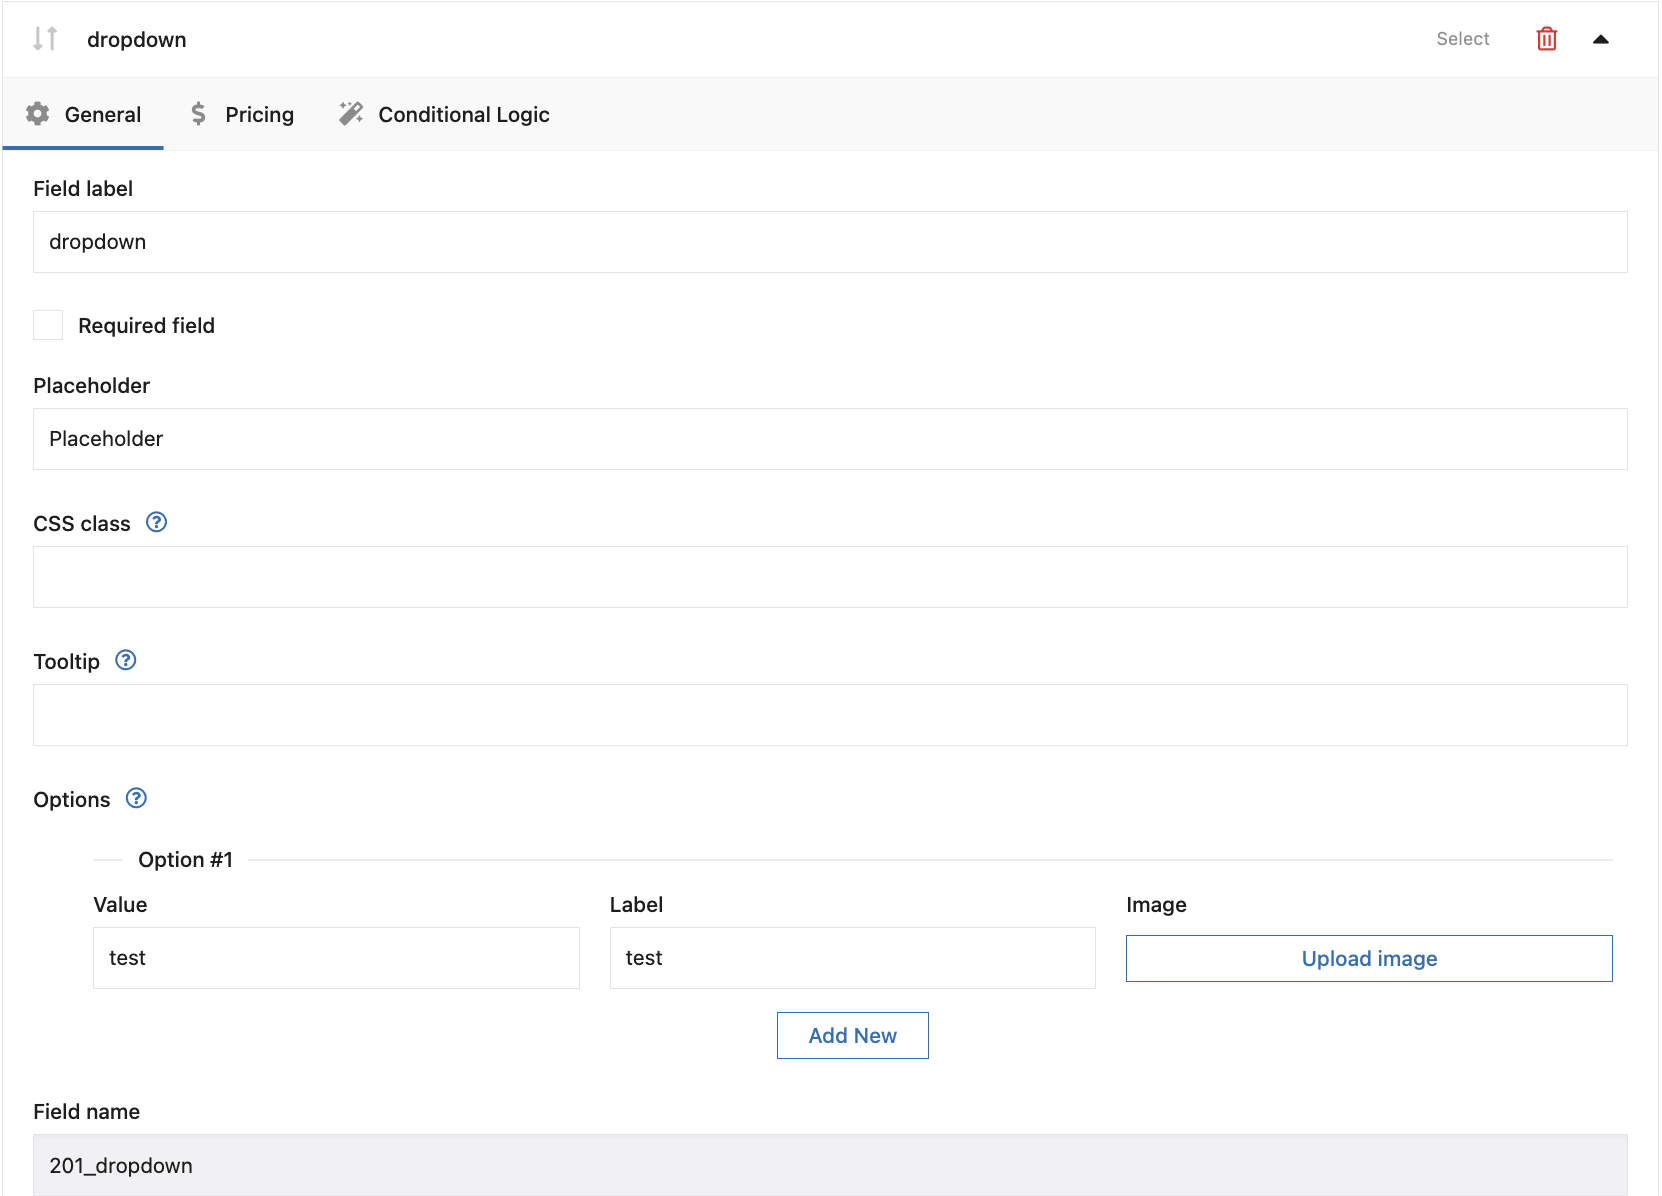
Configuration:
Field label
The field label will appear on the product page.
Required
Checking this option will make the field required. If the field is not completed by the client, an error message appears and he cannot add a product to the cart.
If the field is required, an asterisk "*" will appear next to its name.
Placeholder
The description will appear as the first option to choose from a dropdown list (e.g. "Select from list"). The option will be inactive and not clickable.
CSS Class
You can modify the appearance of the fields on the product page by adding your own CSS class.
Tooltip
The description will appear when the user hovers the cursor over the [?] icon next to the field label.
Value
The entered value is only visible for store admin and displays i.e. in the order edit page if the customer selects that option.
Label
The option label will appear on the product page.
Image
An image that will be associated with a field value and displayed in the product gallery when the value is selected.
PRO Default value
Enter the value of the option to be set as default.
Multi-select
Example of the field type on the product page:
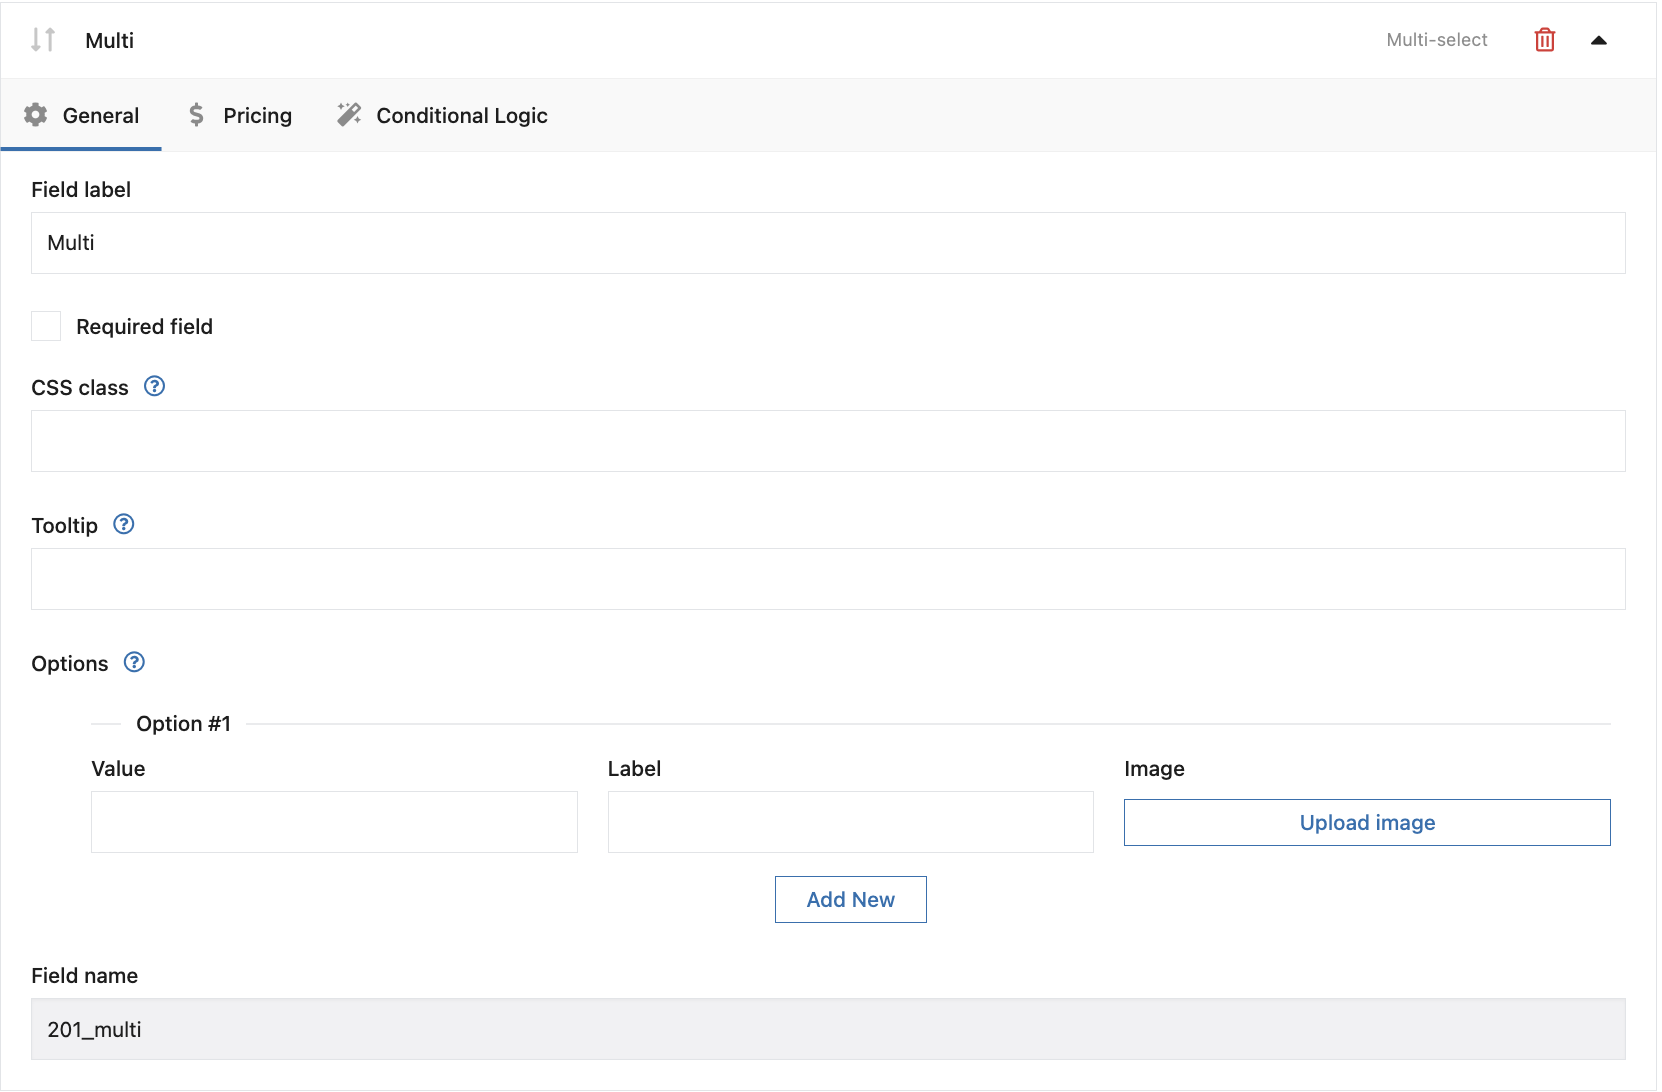
Configuration:
Field label
The field label will appear on the product page.
Required
Checking this option will make the field required. If the field is not completed by the client, an error message appears and he cannot add a product to the cart.
If the field is required, an asterisk "*" will appear next to its name.
CSS Class
You can modify the appearance of the fields on the product page by adding your own CSS class.
Tooltip
The description will appear when the user hovers the cursor over the [?] icon next to the field label.
Value
The entered value is only visible for store admin and displays i.e. in the order edit page if the customer selects that option.
Label
The option label will appear on the product page.
Image
An image that will be associated with a field value and displayed in the product gallery when the value is selected.
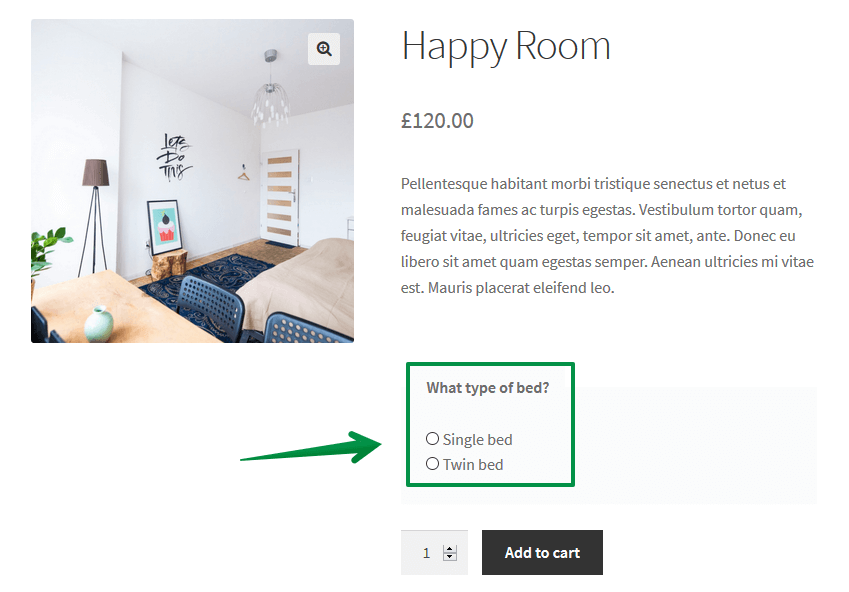
Radio
Example of the field type on the product page:
Configuration:
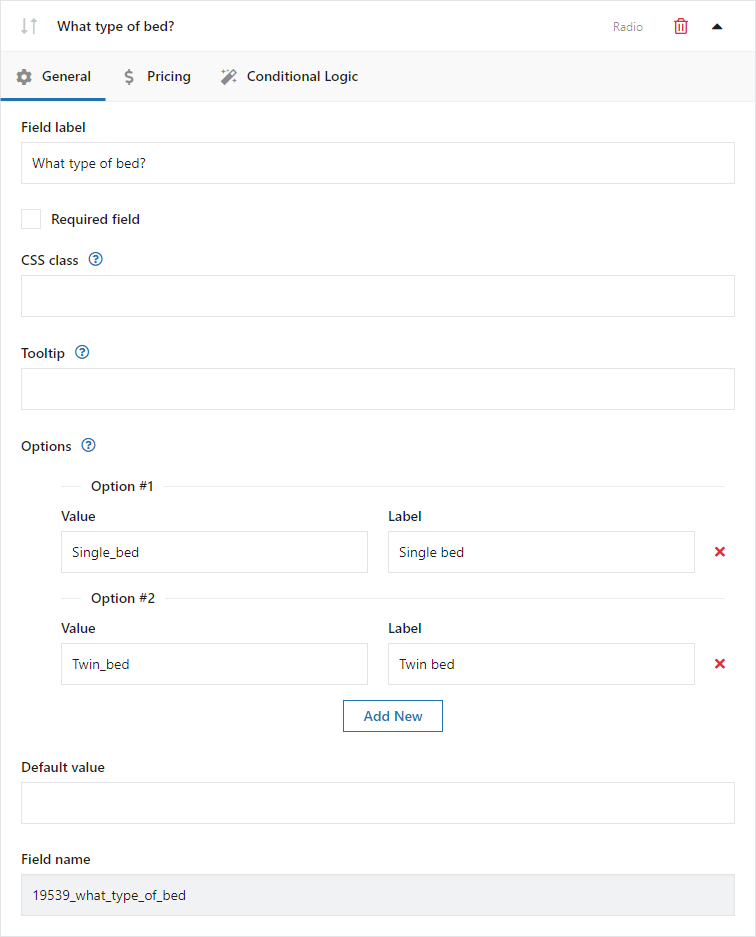
Field label
The field label will appear on the product page.
Required
Checking this option will make the field required. If the field is not completed by the client, an error message appears and he cannot add a product to the cart.
If the field is required, an asterisk "*" will appear next to its name.
CSS Class
You can modify the appearance of the fields on the product page by adding your own CSS class.
Tooltip
The description will appear when the user hovers the cursor over the [?] icon next to the field label.
Value
The entered value is only visible for store admin and displays i.e. in the order edit page if the customer selects that option.
Label
The option label will appear on the product page.
PRO Default value
Enter the value of the option to be set as default.
Radio with images
Example of the field type on the product page:
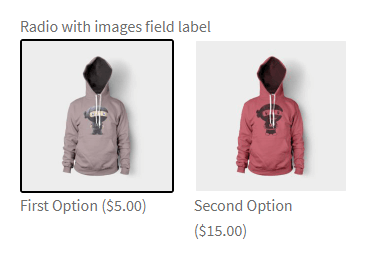
Configuration:
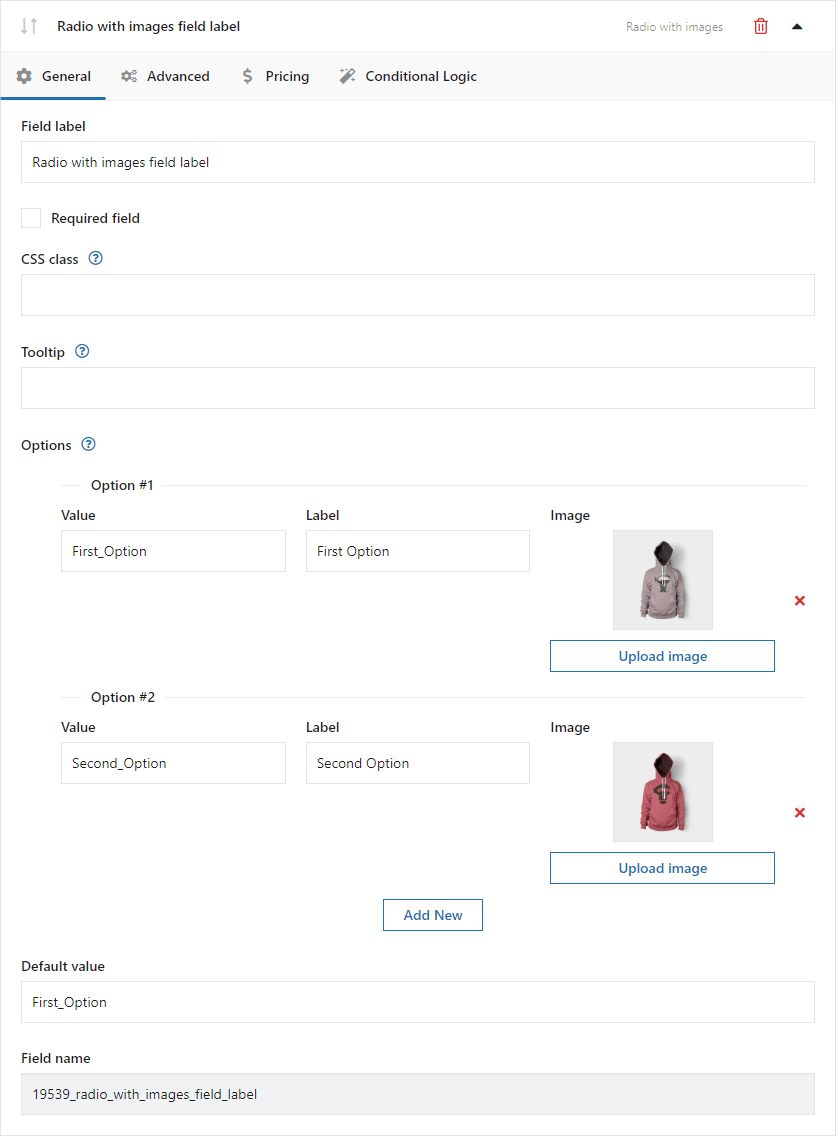
Field label
The field label will appear on the product page.
Required
Checking this option will make the field required. If the field is not completed by the client, an error message appears and he cannot add a product to the cart.
If the field is required, an asterisk "*" will appear next to its name.
CSS Class
You can modify the appearance of the fields on the product page by adding your own CSS class.
Tooltip
The description will appear when the user hovers the cursor over the [?] icon next to the field label.
Value
The entered value is only visible for store admin and displays i.e. in the order edit page if the customer selects that option.
Label
The option label will appear on the product page.
Upload Image
This button adds an image (thumbnail 150 x 150).
PRO Default value
Enter the value of the option to be set as default.
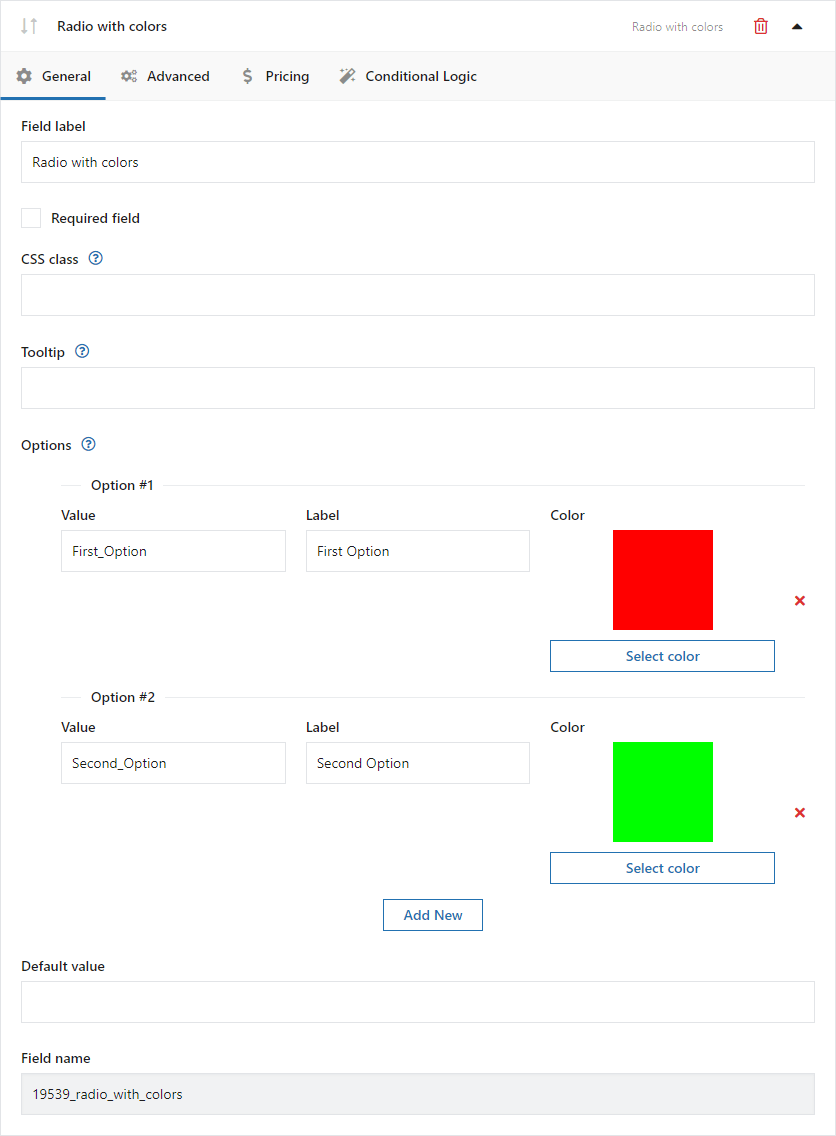
Radio with colors
Example of the field type on the product page:
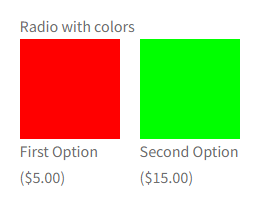
Configuration:
Field label
The field label will appear on the product page.
Required
Checking this option will make the field required. If the field is not completed by the client, an error message appears and he cannot add a product to the cart.
If the field is required, an asterisk "*" will appear next to its name.
CSS Class
You can modify the appearance of the fields on the product page by adding your own CSS class.
Tooltip
The description will appear when the user hovers the cursor over the [?] icon next to the field label.
Value
The entered value is only visible for store admin and displays i.e. in the order edit page if the customer selects that option.
Label
The option label will appear on the product page.
Color
Click this button to select a color using a picker.
PRO Default value
Enter the value of the option to be set as default.
Picker Fields
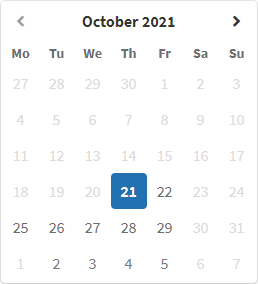
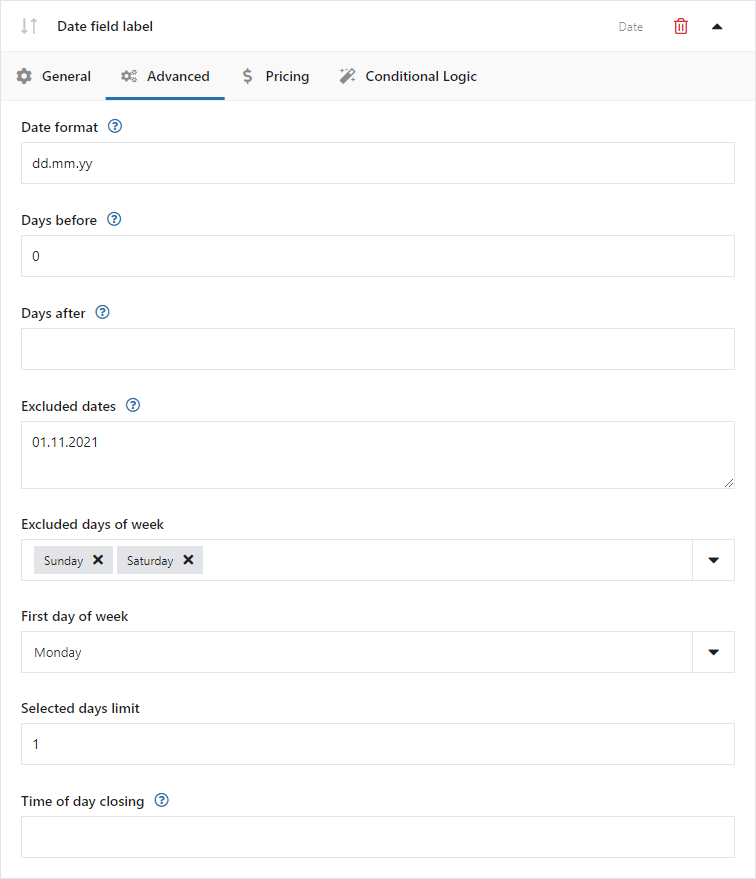
Date
Example of the field type on the product page:
Configuration:
Field label
The field label will appear on the product page.
Required
Checking this option will make the field required. If the field is not completed by the client, an error message appears and he cannot add a product to the cart.
If the field is required, an asterisk "*" will appear next to its name.
Placeholder
The placeholder will appear as a help inside the field.
CSS Class
You can modify the appearance of the fields on the product page by adding your own CSS class.
Tooltip
The description will appear when the user hovers the cursor over the [?] icon next to the field label.
Date format
Default date format dd.mm.yy eg. 01.01.2021.
Days before
Range of days available in the calendar before the current date. Enter 0 to exclude past dates in the calendar.
Days after
Range of days available in the calendar after the current date.
Excluded dates
Specific dates will not be available in the calendar e.g. non-working days. Separate dates with commas and use WP date format e.g. dd.mm.yy.
Excluded days of week
Days of the week will not be available in the calendar e.g. weekends.
First day of week
The day of the week will be shown as the first in the calendar e.g. Monday.
Selected days limit
The maximum number of days available for selection in the calendar.
Time of day closing
The closing time of the day e.g. 15:00. Selecting the current date will not be possible after this time is exceeded.
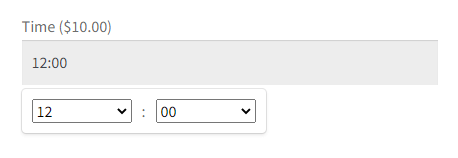
Time
Example of the field type on the product page:
Configuration:

Field label
The field label will appear on the product page.
Required
Checking this option will make the field required. If the field is not completed by the client, an error message appears and he cannot add a product to the cart.
If the field is required, an asterisk "*" will appear next to its name.
Placeholder
The placeholder will appear as a help inside the field.
CSS Class
You can modify the appearance of the fields on the product page by adding your own CSS class.
Tooltip
The description will appear when the user hovers the cursor over the [?] icon next to the field label.
Use 12-hour clock
Check this checkbox to switch the clock to 12-hour (AM/PM) mode.
Step minute
Enter a value between 1 and 60 to set an interval between minutes to choose from the list.
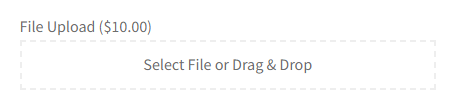
File Upload
Example of the field type on the product page:
Configuration:
Field label
The field label will appear on the product page.
Required
Checking this option will make the field required. If the field is not completed by the client, an error message appears and he cannot add a product to the cart.
If the field is required, an asterisk "*" will appear next to its name.
CSS Class
You can modify the appearance of the fields on the product page by adding your own CSS class.
Tooltip
The description will appear when the user hovers the cursor over the [?] icon next to the field label.
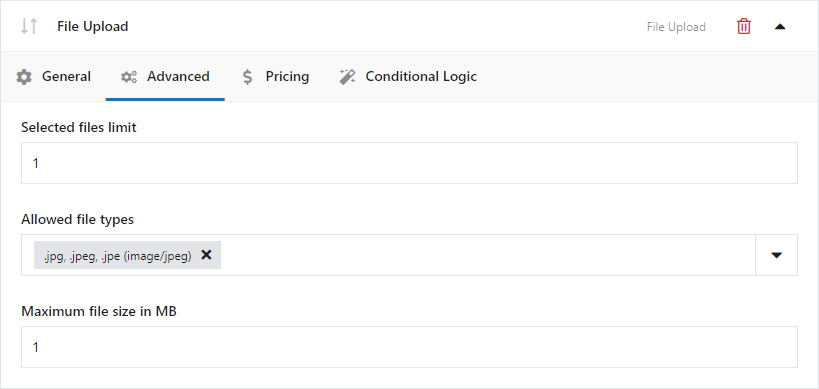
Selected files limit
Set the limit of files available for upload.
Allowed file types
Select the file extensions available for upload.
Maximum file size in MB
Set the allowed file size available for upload.
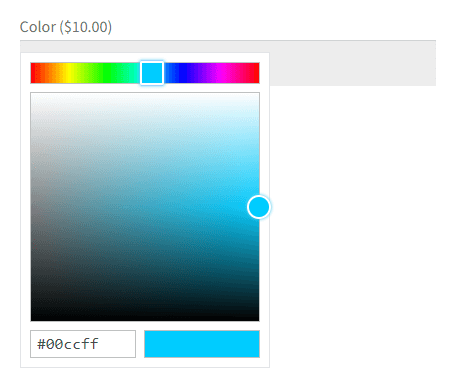
Color
Example of the field type on the product page:
Configuration:
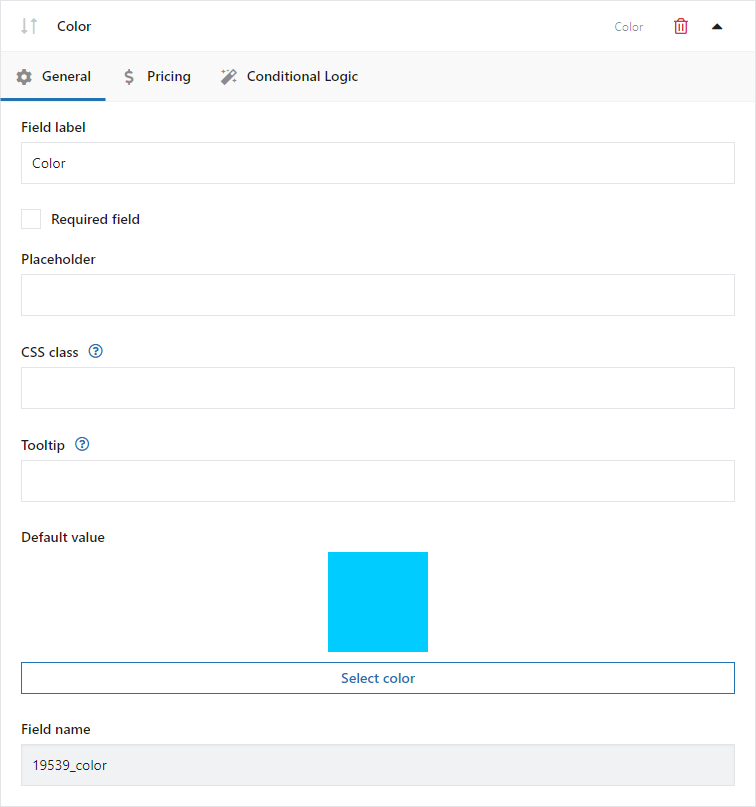
Field label
The field label will appear on the product page.
Required
Checking this option will make the field required. If the field is not completed by the client, an error message appears and he cannot add a product to the cart.
If the field is required, an asterisk "*" will appear next to its name.
Placeholder
The placeholder will appear as a help inside the field.
CSS Class
You can modify the appearance of the fields on the product page by adding your own CSS class.
Tooltip
The description will appear when the user hovers the cursor over the [?] icon next to the field label.
PRO Default value
Enter the value of the option to be set as default.
Other Fields
Heading
Example of the field type on the product page:
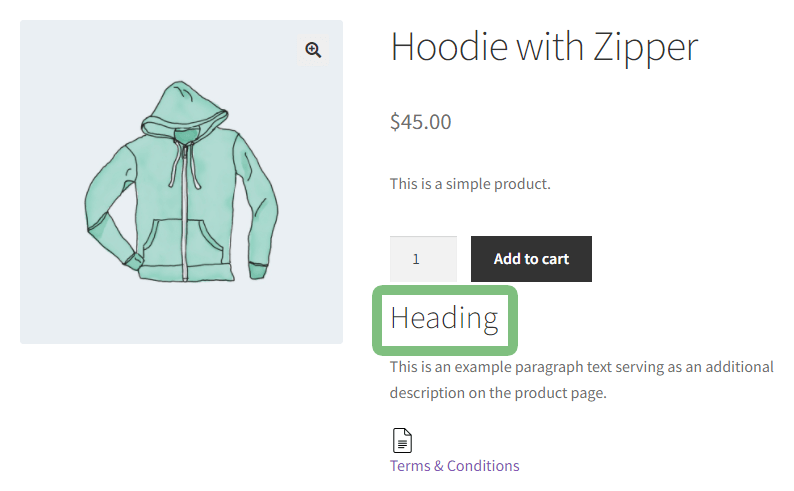
Configuration:
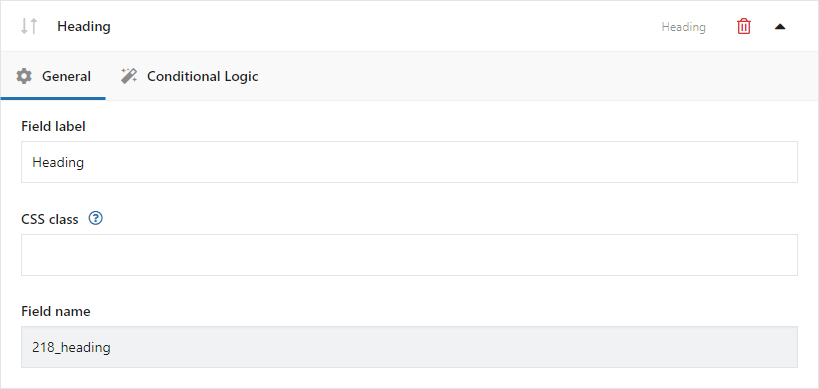
Field label
The field label will appear on the product page.
CSS Class
You can modify the appearance of the fields on the product page by adding your own CSS class.
Paragraph
Example of the field type on the product page:
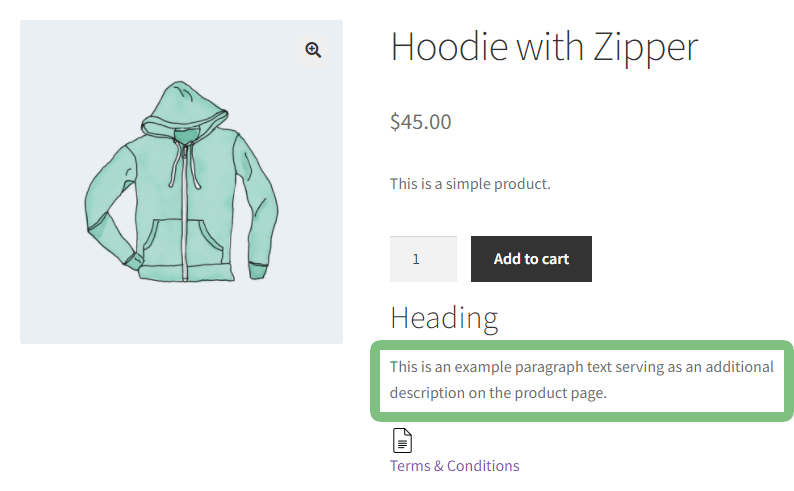
Configuration:

Field label
The field label will appear on the product page.
CSS Class
You can modify the appearance of the fields on the product page by adding your own CSS class.
Image
Example of the field type on the product page:
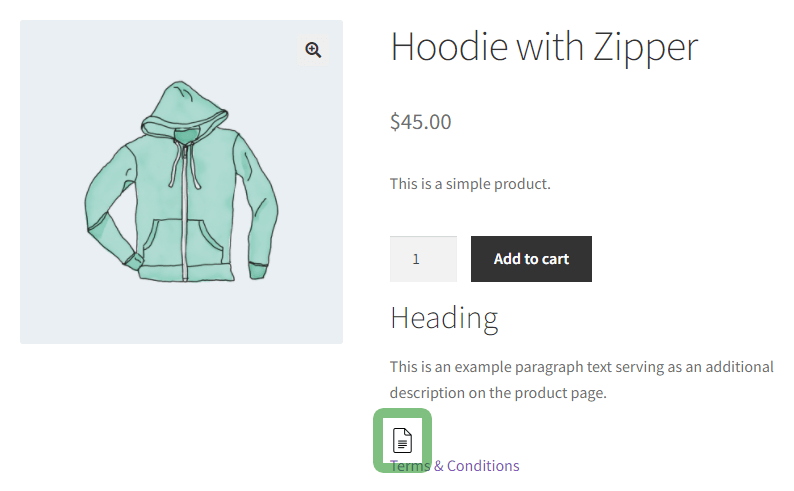
Configuration:
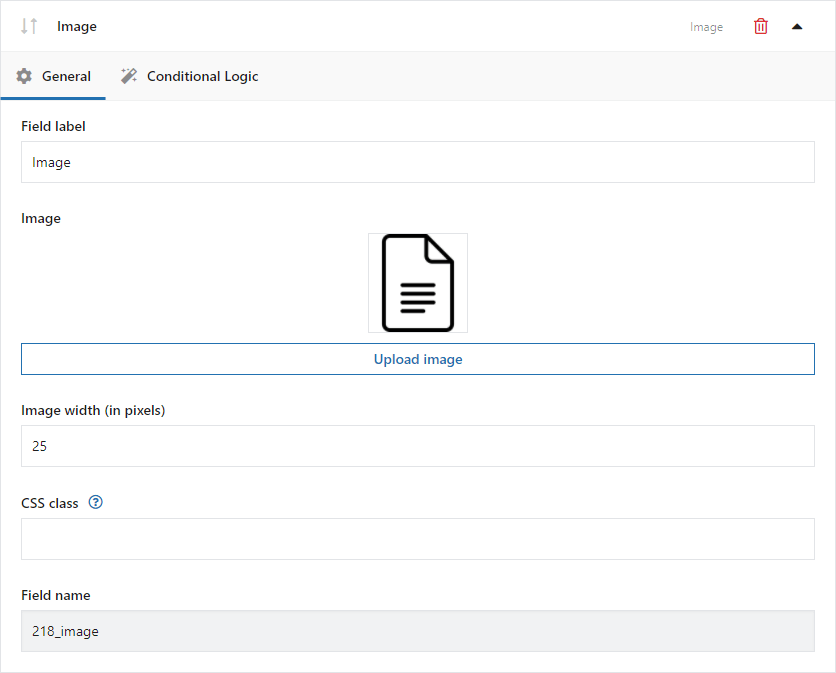
Field label
The field label will appear on the product page.
Upload image
Click this button to select an image.
Image width (in pixels)
Set the width of the inserted image.
CSS Class
You can modify the appearance of the fields on the WooCommerce product page by adding your own CSS class.
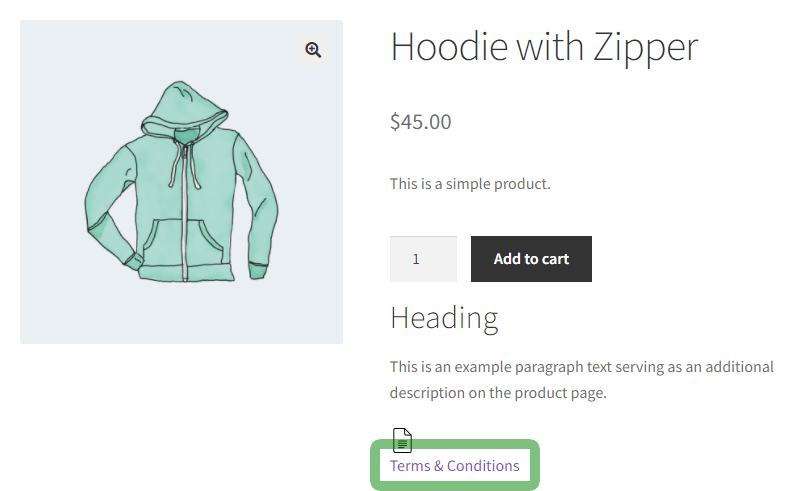
HTML
Example of the field type on the product page:
Configuration:
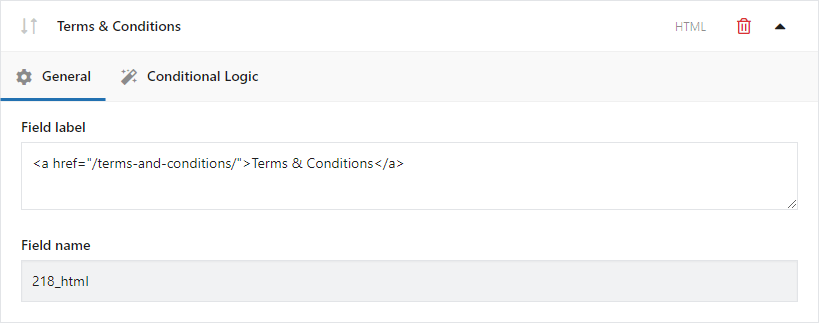
Field label
The field label will appear on the product page.
Options for advanced users
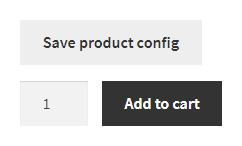
Save product configuration
An additional button "Save product config" is available on the product subpage. It is located above the "Add to Cart" button and it is visible only to the store administrator. The function enables sending to the customer ready product configurations (e.g. via email).
Clicking on the "Save product config" button will save the current configuration of a given product. The configuration will be available in the form of a URL in the browser bar (the address will appear after reloading the page).
Example of the button on the product page:
It is possible to hide the entire container with CSS. Please go to Appearance > Customize > Additional CSS and paste the code below.
div.fpf-fields-config-wrapper {
display:none!important;
}
Data storage location
Data of created product fields and their settings are saved in the database. They can be used for external integration or customization of the plugin.
Field group definitions
The Fields groups are saved in the posts table as fpf_fields. This post type has additional data in the postmeta table where you can find information about the name of the field and what can be entered inside of it. The record in postmeta will have _fields value entered in the meta_key field. In the post ID, you will find the post ID of the field group.
Field Values
The values of specific fields, i.e. data entered there by the user, are stored in the wp_woocommerce_order_itemmeta table. They are associated with a specific product by order_item_id and the definition of the specific meta_id field.
Getting the field values
The following code can be used to retrieve field values and use them in your functions.
Attention!! The scope of support does not include the development of individual functions, and modifying the source code of the theme is at your own risk.
$fields_by_product = [

// product id

368 => [

'Select', // FPF field label

],

];
// order id
$order = wc_get_order( 664 );
$items = $order->get_items();
$values = [];
foreach ( $items as $item ) {
$order_item_id = $item->get_id();
$product_id = $item->get_data()['product_id'];
if ( isset( $fields_by_product[ $product_id ] ) ) {
$values[ $order_item_id ] = [];
foreach ( $fields_by_product[ $product_id ] as $field_label ) {
$values[ $order_item_id ][ $field_label ] = wc_get_order_item_meta( $order_item_id, $field_label, true );
}
}
}
// ... $values
Change the label of the price field
It is possible to customize the labels that contain the brackets with the price. Paste the appropriate code into the functions.php file. Make a backup of the file before making these changes.
Adding a plus before a price greater than 0
add_filter( 'flexible_product_fields/field_args/label_price', function( $label, $price_raw, $field ) {

if ( $price_raw > 0 ) {

return '(+%s)';

}

return $label;

}, 10, 3 );
Removing the brackets
Paste the field name in place of the field name. The field name is in the field settings under the label name e.g. fpf_5801863.
add_filter( 'flexible_product_fields/field_args/label_price', function( $label, $price_raw, $field ) {

if ( $field['id'] === 'field name' ) {

return '';

}

return $label;

}, 10, 3 );
Extra help
💡 How to translate Flexible Product Fields with WPML
Free vs. PRO Feature Comparison
To make it even easier for you to see the difference between the free and pro versions of the Flexible Product Fields for WooCommerce plugin, we've prepared for you a summary table of all the features. Take a look and decide which version you choose.
| Feature | FREE → | PRO → |
| Showing labels and field values in cart summary and checkout page | ✅ | ✅ |
| Set custom product fields as required or not | ✅ | ✅ |
| Editing options for each placeholder and tooltip | ✅ | ✅ |
| CSS Class support | ✅ | ✅ |
| Assigning a group of custom fields to a specific product | ✅ | ✅ |
| Assigning a group of custom fields to a specific variation | ❌ | ✅ |
| Assigning a group of custom fields to a specific category | ❌ | ✅ |
| Assigning a group of custom fields to a specific tag | ❌ | ✅ |
| Assigning a group of custom fields to all products | ❌ | ✅ |
| Custom product fields: Text, Textarea, Number, E-mail, URL, Checkbox, Multi-checkbox, Select, Multi-select, Radio, Radio with images, Radio with colors, Time, Color, Heading, Paragraph, Image, HTML | ✅ | ✅ |
| Custom product fields: Date, File Upload | ❌ | ✅ |
| Arranging field groups in order | ❌ | ✅ |
| Assigning a fixed or percentage price (of on an initial price) to a field | ❌ | ✅ |
| Conditional logic for fields | ❌ | ✅ |
| Duplicating field groups | ❌ | ✅ |
